

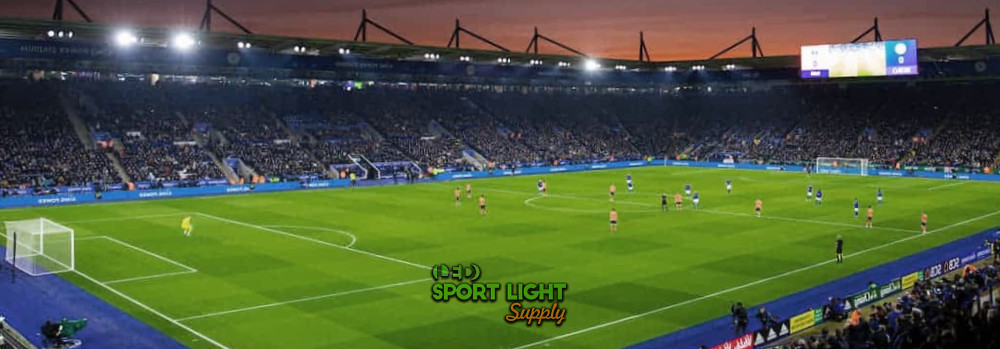
From youth fields running at 200 lux to international arenas pushing past 2,000 lux, lighting decisions affect everything from player safety to grass growth. Let’s take a closer look at how stadium lighting systems are put together, what standards guide them, and how they connect to costs, installation, and even the turf underfoot.
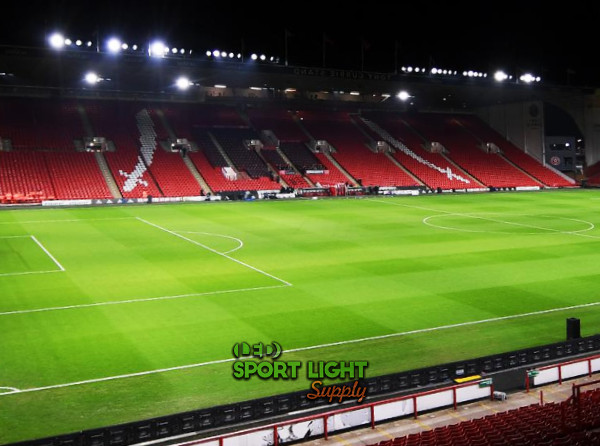 A stadium lighting system is way more than a few bright lamps stuck on tall poles. At the heart of the setup are the luminaires, which today are almost always high-power LED floodlights. Depending on the size of the field and the level of competition, each fixture typically runs anywhere from 600 watts up to 1,500 watts. For a full-size football or soccer stadium, it’s common to see over 100 fixtures working together to hit the required light levels.
What really makes modern LEDs stand out is efficiency. Many stadium-grade LEDs now deliver 140 to 160 lumens per watt, which is a big leap compared to older metal halide systems that often topped out around 80 or 90 lumens per watt. That difference translates directly into lower electricity bills and less heat buildup around the field, which players and maintenance crews both appreciate.
Behind every light is a driver that controls current, protects the fixture, and supports dimming. These drivers are designed to handle voltage fluctuations and usually come with a lifespan similar to the LED chips themselves, often rated for 50,000 hours or more. On top of that, modern systems rely heavily on smart lighting controls. These allow operators to switch between different lighting scenes, like a 300-lux training mode or a 1,500-lux match mode, using a touchscreen or even a phone. It’s flexible, quick, and saves energy when full output isn’t needed.
Power distribution equipment quietly does a lot of heavy lifting. Switchboards, transformers, circuit breakers, and surge protection devices make sure electricity reaches each luminaire safely and consistently. Surge protection is especially important in open stadiums, where lightning strikes and sudden voltage spikes are real risks. While fans never see these components, they’re the reason the lights stay on during bad weather and don’t flicker during peak demand.
Another big part of the system is the optical design inside each luminaire. Stadium lights use carefully engineered lenses and reflectors to shape the beam. Narrow beams might be used for long throws from high poles, while wider beams cover closer areas. This kind of precision helps achieve good uniformity across the field and keeps glare and spill light under control.
Color quality also matters more than people think. Most stadium LEDs operate in the 4,000K to 5,700K range, which gives a bright, daylight-like feel without looking harsh. For televised events, fixtures often meet a CRI of 80 or higher, so colors on jerseys, turf, and advertising boards look natural on camera. Without that, broadcasts can feel flat or washed out, even if the field looks bright in person.
 All of that lighting equipment needs serious structural support. Lighting poles or towers are typically made from galvanized steel and engineered to handle both weight and wind. Once you add up the fixtures, mounting brackets, internal wiring, and access hardware, a single pole can easily support 1,500 to 3,000 kilograms. In high-wind regions, engineers also calculate wind loads that can exceed the static weight of the lights themselves.
Pole height usually ranges from 18 meters for training grounds to over 45 meters for professional stadiums. Taller poles help improve uniformity and reduce glare angles, but they also require deeper foundations, sometimes extending 3 to 6 meters underground, depending on soil conditions. Many poles include access doors at the base, grounding systems for safety, and either internal ladders or lowering mechanisms so fixtures can be serviced without cranes.
Control panels and monitoring systems tie everything together. These are often located near the stadium’s main electrical room and connect lighting to backup generators or uninterruptible power supplies. During major events, especially televised matches, having lighting backed by emergency power is non-negotiable. A well-designed control system can also track energy use, detect fixture failures, and send alerts before small issues turn into visible problems.
Good stadium lighting plays a huge role in how the game is actually played on the field. When lighting is done right, athletes can judge speed, distance, and ball movement almost instinctively. That matters a lot when a football is flying at roughly 25 meters per second, or when a baseball comes off the bat at 160 km/h or more. At those speeds, even a split-second delay caused by shadows or uneven brightness can change the outcome of a play.
Consistent light levels across the entire field help eliminate visual surprises. Dark corners, patchy zones, or harsh contrasts force players to subconsciously adjust, which can slow reaction time and increase fatigue. Referees and officials benefit just as much. Clear visibility makes it easier to spot fouls, judge offsides, or track boundary lines accurately, especially during fast transitions. With uniform lighting, everyone on the field can focus on decision-making and execution instead of compensating for what they can’t see.
Most fans don’t walk into a stadium thinking about lighting, but they definitely feel the difference. When brightness is even and comfortable, eyes don’t strain during a two- or three-hour match. Seating areas that are too dim or overly bright can pull attention away from the action, especially during night games.
For broadcasters, lighting quality is a whole different level of concern. Camera systems are unforgiving. Poor lighting leads to washed-out colors, grainy slow-motion replays, and inconsistent exposure when cameras pan across the field. That’s why professional broadcasts usually call for 1,500 to 2,000 lux at playing level, while smaller local or amateur matches often operate comfortably at 300 to 500 lux. High-quality lighting also improves color consistency, so team uniforms, sponsor boards, and turf all look the way they’re supposed to on screen. When lighting works well, viewers at home barely think about it, which is exactly the point.
Lighting doesn’t just support the game itself; it shapes how a stadium is used day to day. With a well-designed system, venues aren’t limited by daylight hours. Night matches, late training sessions, concerts, and community events all become possible without compromising visibility or safety.
Modern LED systems bring another advantage: flexibility. Operators can dial lighting levels up or down depending on the activity. A full-capacity match might run at 1,200 lux, while a casual training session could drop to 300 lux without any hassle. Thanks to dimming and smart controls, energy use during practices can fall by as much as 60%, which makes a noticeable difference on annual electricity bills. Over a full season, that kind of efficiency turns lighting from a fixed expense into a controllable tool that supports both performance and operations.
Illuminance is usually measured in lux or foot-candles (fc), and the conversion is straightforward: 1 fc equals about 10.76 lux. The target level depends heavily on the sport and how the venue is used. Community football and soccer fields often operate comfortably at 200 to 300 lux, which is enough for safe play and casual viewing. High school and college venues typically push that up to 500–750 lux, especially if spectators and basic filming are involved.
Professional stadiums and televised events sit at the top end of the scale. It’s not unusual for major leagues and international tournaments to run at 1,500 lux or more, with some venues exceeding 2,000 lux to meet broadcast requirements. The key is matching the lighting level to actual use, since over-lighting wastes energy without adding real value.
Brightness alone doesn’t tell the whole story. Uniformity plays just as big a role in how the field feels to players and officials. A commonly accepted standard for competition play is a minimum-to-average ratio of 0.7. In simple terms, that means the darkest spot on the field still has at least 70% of the average light level.
When uniformity drops too low, eyes constantly adjust as players move from bright areas into dimmer ones. That leads to visual fatigue and makes it harder to track fast-moving balls or opponents. Good uniformity creates a smooth, balanced look across the field, even during quick camera pans or long diagonal passes.
Most modern stadium LEDs fall within a 4,000K to 5,700K color temperature range. Cooler light around 5,000K is especially popular because it closely mimics natural daylight. It helps players see details clearly and works well with broadcast cameras, which are tuned for daylight conditions.
Color rendering index, or CRI, adds another layer. For amateur and training facilities, a CRI above 70 is usually acceptable. Professional and broadcast venues often require CRI values of 80 or higher. Higher CRI makes a real difference on screen, keeping team colors, turf, and sponsor signage looking accurate rather than dull or distorted.
Glare is one of the most common complaints in poorly designed lighting systems. Excessive brightness in the wrong direction can distract players, especially when they look up for high balls. It can also bother fans and nearby residents. Modern stadium fixtures use advanced optics to control beam angles tightly, directing light where it’s needed and nowhere else.
Many designs aim to keep athlete glare ratings below GR 50, while shields and precise aiming help limit spill light beyond the stadium boundary. This has become even more relevant as stadiums are increasingly built close to residential and mixed-use areas.
With high-speed cameras and slow-motion replays now standard, flicker has become a serious consideration. Poor-quality lighting can cause visible banding or pulsing on camera, especially at high frame rates. Stadium-grade LED systems are designed with low-flicker drivers that maintain stable output even during instant replays at 1,000 frames per second or more.
For venues hosting televised events, flicker-free performance isn’t optional. It ensures clean footage, smoother replays, and a better viewing experience for audiences at home.
Stadium lights are exposed to wind, rain, heat, and cold year-round, so durability matters. Most outdoor stadium luminaires are rated IP65 or higher, meaning they’re sealed against dust and strong water jets. Temperature tolerance is another factor, with many systems designed to operate reliably from -30°C to 50°C.
| Category | Typical Values |
|---|---|
| Community Fields | 200–300 lux |
| High School / College | 500–750 lux |
| Professional / Broadcast | 1,500–2,000+ lux |
| Foot-candle Conversion | 1 fc ≈ 10.76 lux |
| Uniformity Ratio | ≥ 0.7 (min/avg) |
| Color Temperature | 4,000K–5,700K |
| CRI (Amateur) | ≥ 70 |
| CRI (Professional) | ≥ 80 |
| Glare Rating (Athletes) | < GR 50 |
| Flicker Performance | Stable at 1,000+ fps |
| Environmental Rating | IP65 or higher |
| Operating Temperature | -30°C to 50°C |
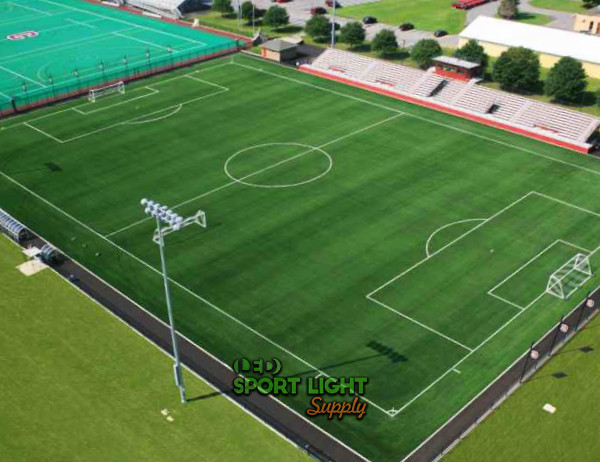
Choosing the number of lighting poles is one of the first and most important decisions in a stadium lighting project. Pole count depends on field dimensions, required illumination levels, and whether the venue is used for training, competitive play, or broadcast events. Standard soccer or football fields typically use 4 to 8 poles, while larger stadiums often require 12 poles or more to achieve higher brightness and better lighting uniformity.
Pole height strongly influences how evenly light is distributed. Training facilities commonly use poles in the 18–25 meter range, which helps reduce costs and simplifies maintenance. Professional stadiums usually require much taller structures, often 40–45 meters high. Taller poles allow light to strike the field at wider angles, improving uniformity and reducing glare for players and officials. However, increased height also means higher material costs and more robust foundations, so designers must balance performance with budget.
In modern enclosed or semi-enclosed stadiums, lighting is often mounted on the roof rather than on freestanding poles. In these cases, roof height becomes a critical design parameter.
Stadium roof heights typically range from 25 to 60 meters above the playing surface, depending on venue size and architectural design. Smaller covered stadiums may have roof mounting heights around 25–35 meters, while large international arenas with long roof spans can exceed 50 meters.
Higher roof mounting positions provide excellent light spread and reduce obstructions around the field, but they also increase aiming complexity and structural load requirements. The roof structure must be engineered to handle not only the static weight of the luminaires but also dynamic wind forces transmitted through the building. Proper coordination between lighting designers and structural engineers is essential to ensure safety, performance, and long-term reliability.
Once mounting height and structure are defined, designers determine how many luminaires are needed per pole or roof segment. A single pole typically supports 6 to 20 LED floodlights, depending on beam angles and target lux levels. A mid-sized stadium often uses 100–140 fixtures, while elite broadcast-ready venues may exceed 300 luminaires.
The goal is not to maximize fixture count but to optimize beam overlap. Correct aiming ensures smooth, uniform coverage while minimizing glare for players, spectators, and cameras. Poor aiming can create bright hotspots, shadows, and unwanted light spill outside the stadium.
Although LED fixtures are lighter than traditional metal halide lamps, their combined weight is still significant. A stadium-grade LED floodlight usually weighs 25–45 kg. A pole carrying 12 fixtures may support 300–540 kg from luminaires alone, excluding brackets, cabling, and safety hardware.
Environmental forces must also be considered. Wind load is especially critical for tall poles and large roof-mounted arrays. In severe conditions, the total force acting on a single structure can exceed 3,000 kg, particularly in open or coastal regions. Designs account for local wind speeds, seismic activity, and safety factors to ensure long-term structural stability.
Pole spacing directly affects lighting quality. Poles placed too close together can cause excessive overlap and glare, while poles spaced too far apart create shadows and dark areas. For rectangular fields, poles are commonly spaced 40–60 meters apart, adjusted according to mounting height and beam distribution.
Photometric simulations are essential during the design phase. These studies show how light falls across the field and help optimize pole placement, roof mounting locations, and aiming angles. Soil conditions also influence design: soft ground may require foundations 3–6 meters deep, while rocky sites need alternative anchoring solutions. Proper planning at this stage prevents costly corrections later.
| Item | Typical Range |
|---|---|
| Poles per Field | 4–8 (standard), 12+ (large stadiums) |
| Pole Height (Training) | 18–25 m |
| Pole Height (Professional) | 40–45 m |
| Roof Height Above Field | 25–60 m |
| Lights per Pole / Roof Section | 6–20 fixtures |
| Total Fixtures | 100–140 (mid-size), 300+ (elite) |
| Fixture Weight | 25–45 kg each |
| Load per Pole (Fixtures Only) | 300–540 kg |
| Wind Load Capacity | 3,000 kg+ |
| Pole Spacing | 40–60 m |
| Foundation Depth | 3–6 m |
Stadium lighting costs can swing quite a bit depending on the size of the venue and the performance level you’re aiming for. For a small community or training field, the budget often falls in the range of USD 80,000 to 150,000, covering LED fixtures, poles, and basic controls. These projects usually focus on meeting local play standards without going overboard on broadcast features.
Mid-sized stadium upgrades are a different story. Once you factor in higher light levels, better uniformity, and the removal of older metal halide systems, costs commonly land between USD 400,000 and 900,000. Professional venues, especially those designed for national or international broadcasts, can easily go beyond USD 3 million. Custom-designed poles, high-output luminaires, advanced control systems, and strict glare management all push the price up.
Installation itself is a major part of the budget. Labor, crane rental for lifting poles and fixtures, electrical work, trenching, and system commissioning typically make up 20 to 35% of the total project cost. Adding smart controls and monitoring systems increases the upfront investment, but these features often pay for themselves within 3 to 5 years by cutting energy use and simplifying maintenance.
One of the biggest advantages of modern LED stadium lighting is lower operating cost. Compared to older metal halide systems, LEDs can reduce power consumption by around 50% or more. For example, a stadium that once used 1,000 kWh per match might drop to 400–500 kWh after an LED upgrade. Over a season with 100 or more events, that difference adds up quickly.
Maintenance savings are just as noticeable. Traditional lamps often needed replacement every few thousand hours, which meant frequent labor and equipment costs. LED fixtures, on the other hand, are commonly rated for 50,000 to 100,000 hours before major replacement. That translates into fewer disruptions, lower maintenance budgets, and more predictable operating expenses year after year.
Funding can make a big difference in how manageable a lighting project feels. In many regions, energy-efficient upgrades qualify for financial support. In the U.S., for example, utility rebate programs may cover 20 to 40% of the cost of LED fixtures, especially when older systems are being replaced. These rebates are often tied to verified energy savings, so proper documentation matters.
Municipalities, school districts, and community sports organizations may also have access to sports infrastructure or sustainability grants. Projects that reduce energy use, improve safety, and limit light pollution tend to score well in funding evaluations. Some professional and semi-professional clubs take a different approach, partnering with sponsors and presenting lighting upgrades as part of a broader sustainability or green stadium initiative. When funding and planning line up, even large-scale lighting projects become much more achievable.
| Category | Typical Range |
|---|---|
| Small / Community Field | USD 80,000–150,000 |
| Mid-Sized Stadium Upgrade | USD 400,000–900,000 |
| Professional / Broadcast Stadium | USD 3,000,000+ |
| Installation Share of Total Cost | 20–35% |
| Energy Use (Before LED) | ~1,000 kWh per match |
| Energy Use (After LED) | 400–500 kWh per match |
| Utility Rebates (U.S.) | 20–40% of fixture cost |
 The quality of the grass has a huge influence on how a game feels, and lighting plays a quieter role in keeping that grass healthy. Most outdoor stadiums use natural turf, with common choices like Bermuda grass for warm climates or ryegrass for cooler regions. These grasses rely heavily on sunlight to grow evenly and maintain strong root systems. Without enough light, turf thins out, becomes patchy, and struggles to recover after matches.
Some venues use hybrid grass systems, which combine natural grass with synthetic fibers stitched into the surface. This setup improves durability and helps the field hold up under heavy use, but the living grass still needs light to survive. Stadiums with roofs, high stands, or partial covers often deal with large shaded areas that may receive only two to four hours of direct sunlight per day, far less than what healthy turf prefers.
Standard stadium lighting is built for people, not plants. Match lighting focuses on delivering high lux levels to the playing surface for a few hours at a time, usually during games or events. It doesn’t provide the right spectrum or exposure duration for photosynthesis. As a result, grass in shaded zones under stands or near tall structures can slowly weaken, even if the field looks bright during matches.
Over time, this imbalance shows up as uneven growth, softer ground, and higher injury risk for players. Groundskeepers often have to rotate turf, replace damaged sections, or limit field use to prevent further wear. Without additional support, some areas of the pitch simply can’t recover fast enough between events.
To solve that problem, many professional clubs now rely on supplemental grow lighting. These systems are designed specifically for plant growth, using targeted wavelengths, mainly red and blue light, to support photosynthesis. Grow lights are typically delivered through mobile rigs that can be rolled onto shaded sections of the field or through suspended systems mounted above the turf.
Light output is measured differently for plants, usually in micromoles per square meter per second, and stadium grow lights often deliver 200 to 400 µmol/m²/s depending on grass type and growth stage. Clubs that use grow lighting regularly report denser turf, stronger roots, and more even playing surfaces, even during winter or congested match schedules.
While grow lighting systems add to operational costs, they often reduce the need for frequent re-turfing and emergency repairs. In the long run, keeping the grass healthy with the right light can save money and help maintain a consistent, high-quality playing surface all year round.
Stadium lighting keeps evolving. LEDs are becoming more efficient each year, controls are smarter, and designs focus more on comfort for players, fans, and nearby communities. At the same time, the connection between lighting, operations, and field health is clearer than ever. When brightness levels, pole layouts, and turf care all work together, the result is a venue that performs well long after the lights switch on.
Stadium Lighting Q&A
Before getting into exact numbers, it helps to understand that stadium lighting isn’t one-size-fits-all. The right setup depends on how the field will be used, the level of play, and the visual standards you’re aiming to meet. Once those basics are clear, decisions about fixture count and layout become much easier—and far more cost-effective in the long run.
Field Size and Target Brightness
The total number of stadium lights always starts with two basic questions: how big is the field, and how bright does it need to be? A full-size football or soccer field, roughly 105 × 68 meters, typically needs between 80 and 120 LED floodlights for competition-level use, assuming target light levels around 500 to 750 lux. If the venue is built for professional leagues or televised matches, that number can quickly jump to 200 or even 300+ fixtures, especially when brightness requirements climb past 1,500 lux.
Uniformity and Lighting Layout
It’s not just about hitting an average lux number. Uniformity plays a huge role in determining how many lights are needed. Higher uniformity targets, like a minimum-to-average ratio of 0.7 or above, often mean using more fixtures with carefully aimed beam angles. This approach reduces dark patches and harsh contrasts, but it also increases fixture count. That’s why photometric planning is so valuable before buying anything. A proper lighting simulation shows exactly how many lights are required and where they should be placed, avoiding both under-lighting and unnecessary overspending.
 Both approaches can work, but in real-world stadium projects, many designers lean toward more fixtures with lower individual wattage rather than a few extremely powerful lights. Using a higher number of lights allows beam angles to overlap more evenly, which improves uniformity across the field and helps avoid harsh shadows. For example, spreading 1,200 lux across the pitch with 160 fixtures often produces a smoother result than trying to hit the same level with 80 very high-power units.
Flexibility and Future Adjustments
Another advantage of multiple lower-power fixtures is flexibility. Lighting levels can be adjusted more precisely through dimming or zoning, especially when smart controls are involved. If a stadium later needs to add a broadcast mode or reduce brightness for training sessions, it’s easier to fine-tune output when the system isn’t relying on just a handful of ultra-bright fixtures. While fewer high-power lights may reduce pole hardware costs, they can limit future options and increase glare if not handled carefully.