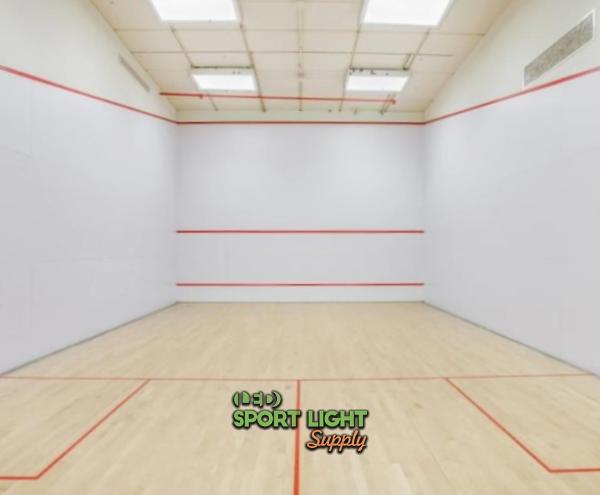
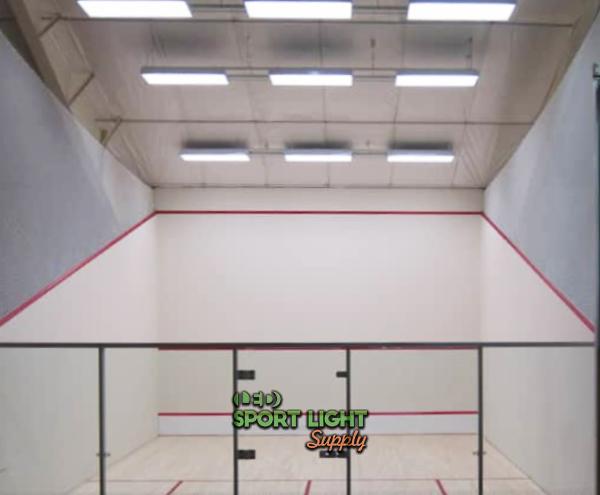
A squash court is a small box with big intensity. The ball can travel over 200 kilometers per hour, players constantly look up toward the front wall, and rallies unfold in tight corners. When the lighting is right, nobody notices. When it is wrong, everyone feels it. Shadows creep into the back court, glare flashes at eye level, and the ball disappears for a split second that changes the rally.
Designing a squash court lighting layout is not just about hanging a few fixtures from the ceiling. It involves spacing geometry, wattage calculations, glare control, vertical illumination, and sometimes even smart controls for tournaments and broadcasts. Let’s walk through what actually works in real courts, based on industry standards and practical field experience.
The Geometry of Shadow-Free Play
Designing the lighting layout for a squash court is a bit like setting up a tactical formation. Every fixture has a position, and if one is slightly off, the whole balance shifts. Because squash is played in a fully enclosed rectangular space with fast ball speeds and constant wall rebounds, lighting distribution has to be controlled with real precision. It is not just about brightness. It is about uniformity, beam control, glare management, and spatial geometry working together.
| Item | Value |
|---|---|
| Standard court area | 62.4 m² |
| Typical competition level | 500–750 lux |
| Tournament level | 750–1000 lux |
| Lumens required (750 lux target) | ~58,500 lm |
| Typical number of LED fixtures | 6 units |
| Estimated total LED wattage | 400–800 W |
| Old metal halide system | 1600–2400 W |
| Annual energy use (600 W system) | ~1,440 kWh |
Spacing-to-Mounting Height Ratio
 At the core of squash court lighting design is the spacing-to-mounting height ratio, often shortened to SHR. In simple terms, this ratio compares the distance between fixtures to the height at which they are installed above the playing surface.
For LED high bay luminaires typically used in indoor sports facilities, a spacing-to-height ratio between 1.0 and 1.5 is commonly recommended. That means if your mounting height is 6 meters above the finished floor level, fixture spacing will usually fall between 6 and 9 meters. However, squash courts are narrower than many sports halls, so practical spacing often lands closer to 6 to 7.5 meters to maintain proper illuminance uniformity.
A standard singles squash court measures approximately 9.75 meters in length and 6.4 meters in width. With a 6-meter mounting height, designers often position fixtures in a symmetrical arrangement to keep the light distribution even across the full 62.4 square meters of floor area. If spacing exceeds the recommended ratio, the illuminance uniformity ratio, typically expressed as minimum lux divided by average lux, can drop below 0.6. For competitive environments, designers usually aim for a uniformity ratio of at least 0.7.
If fixtures are spaced too far apart, you start to see reduced lux levels in the back corners and along the side walls. These darker zones might measure 30 to 40 percent lower than the center court average. On the other hand, spacing them too close can create high central lux values, sometimes 20 percent higher directly beneath the luminaire, leading to visual imbalance.
The goal is to achieve balanced horizontal and vertical illuminance so the player’s eyes do not have to constantly adapt when the ball transitions from mid-court to the back wall.
Understanding Beam Angle and Light Distribution
Spacing is only half the story. Beam angle plays a huge role in how light spreads. A 60-degree beam angle produces a tighter, more concentrated light distribution, which works better for higher mounting heights, typically 7 meters and above. A 90-degree beam spreads light more broadly and suits lower ceilings around 5.5 to 6 meters.
Choosing the wrong beam angle can distort the spacing-to-height calculation. For example, installing a 90-degree beam fixture at 8 meters may result in excessive spill light and reduced average lux on the playing surface. Meanwhile, using a narrow 60-degree beam at 5.5 meters may cause excessive brightness directly under the fixture.
Lighting simulations often reveal these differences clearly. In real projects, small adjustments of 0.5 meters in spacing or switching from a 90-degree optic to a 70-degree optic can increase uniformity by 10 to 15 percent.
Typical Layout Configurations
In recreational squash facilities with ceiling heights between 5.5 and 6 meters, either a 4-fixture or 6-fixture configuration is common. A 4-fixture layout may be sufficient for training courts targeting around 300 to 500 lux. However, when aiming for 500 to 750 lux for club-level competition, 6 luminaires are typically used to improve both brightness and uniformity.
For courts aligned with performance standards referenced by the World Squash Federation, designers frequently select 6 high-efficiency LED sports luminaires, each delivering between 10,000 and 18,000 lumens depending on the required illuminance level.
There are two common layout strategies. One places fixtures along the centerline of the court, evenly spaced from front wall to back wall. The other uses two parallel rows positioned closer to the side walls. The second configuration often produces better vertical illumination on the front and side walls, which is especially helpful because squash relies heavily on wall rebounds.
Linear LED sports luminaires have gained popularity in recent years. Instead of acting as point light sources, they create a more continuous light distribution. This reduces contrast ratios between adjacent zones and improves perceived brightness consistency. In photometric testing, linear systems can sometimes achieve uniformity ratios above 0.75 without increasing total wattage.
Avoiding the Hot Spot and Cave Effect
A common design problem in squash courts is what many installers casually call the hot spot and cave effect. The center of the court may measure 800 lux, while the rear corners drop to 500 lux or below. On paper, the average might still look acceptable at 650 lux, but players will feel the inconsistency immediately.
When a squash ball travels at high speed from the front wall into a darker back corner, the change in contrast can affect visual tracking. Even a 200 lux difference across zones can create noticeable adaptation strain for players.
Maintaining a minimum-to-average uniformity ratio of 0.7 or higher helps avoid this problem. This requires thoughtful spacing, correct optic selection, and consideration of wall reflectance. Light-colored wall finishes with reflectance values around 0.7 to 0.8 can improve overall brightness perception and reduce shadow formation. Darker surfaces absorb more light and require additional lumens to compensate.
The Role of Lighting Simulation
Before any installation begins, professional lighting designers use photometric simulation software to map horizontal illuminance, vertical illuminance, and uniformity ratios across the entire court. These simulations provide detailed contour plots showing lux levels at multiple measurement points, often following a grid of 0.5-meter intervals.
For example, a properly designed 6-fixture LED system might produce an average horizontal illuminance of 750 lux, a minimum of 550 lux, and a vertical illuminance on the front wall of 500 lux. Without simulation, those numbers are just guesses.
Adjusting a layout digitally takes minutes. Relocating fixtures after installation can mean additional labor costs, ceiling repairs, and operational downtime. In real-world projects, investing in simulation typically reduces installation errors and long-term maintenance adjustments.
When spacing, mounting height, beam angle, and lumen output are calculated together, the result is a court that feels visually stable. No bright islands, no gloomy corners. Just smooth, consistent illumination that allows players to focus on the rally instead of the lighting.
Wattage Wisdom – How Many Watts Do You Need
When clients first ask about squash court lighting, the question is almost always the same: how many watts do we need? It sounds straightforward, but wattage alone does not tell you how bright your court will feel. Watts measure energy consumption. Brightness is measured in lumens, and what players actually experience on the court is lux, which means lumens per square meter.
If you focus only on watts, you might end up with a system that consumes a lot of electricity but still leaves shadows in the back corner. What really matters is total lumen output, illuminance level in lux, and uniformity across the entire playing area.
Stop Thinking in Watts Alone
Let’s talk about realistic lighting targets. For recreational squash courts, typical horizontal illuminance levels range between 300 and 500 lux. That is comfortable for casual training and club members playing after work.
For more competitive environments, 500 to 750 lux is common. Once you move into national-level tournaments, designers often aim for 750 to 1000 lux. Televised international matches can exceed 1000 lux, especially when high-speed cameras are involved.
These ranges align with guidance referenced by the and other indoor sports lighting recommendations. The reason for higher lux in professional settings is not just visibility. Broadcast clarity, slow-motion replay, and player tracking systems demand higher light intensity and stable color rendering.
Another factor many people overlook is vertical illuminance. Squash is not just about lighting the floor. The front wall, where most action happens, must also be properly illuminated. If the floor measures 800 lux but the front wall only measures 400 lux, the ball can visually “fade” during high rebounds.
So instead of asking how many watts, a better starting point is this: what lux level are you aiming for, and what uniformity ratio do you require? From there, wattage becomes a result of calculation rather than guesswork.
Step-by-Step Wattage Estimation
Let’s walk through a practical scenario with real numbers so it feels less abstract.
A standard singles squash court measures 9.75 meters in length and 6.4 meters in width. Multiply those and you get approximately 62.4 square meters of playing area.
Suppose the target is 750 lux for competitive club play. To calculate the required lumens on the floor, multiply area by target lux.
62.4 square meters times 750 lux equals 46,800 lumens.
That number represents the theoretical lumens needed at floor level. In reality, no lighting system is 100 percent efficient. Some light is absorbed by walls, some is lost due to fixture optics, and over time dust and aging reduce output. Designers usually apply a maintenance factor of around 0.8 for indoor sports facilities.
Divide 46,800 lumens by 0.8 and you get approximately 58,500 lumens required from the installed lighting system.
Now we translate lumens into fixtures.
If each LED sports luminaire delivers 12,000 lumens, dividing 58,500 by 12,000 gives roughly 4.9 fixtures. Since you cannot install a fraction of a fixture and uniformity improves with more distribution points, most designers would choose 6 fixtures.
With 6 fixtures at 12,000 lumens each, total system output becomes 72,000 lumens. That extra margin helps improve uniformity and wall illumination, which is especially useful in enclosed courts.
Converting Lumens to Watts
Modern LED sports lighting typically operates between 130 and 170 lumens per watt, depending on the manufacturer and driver efficiency. Let’s assume a conservative 150 lumens per watt.
If your system needs around 60,000 lumens, divide that by 150 lumens per watt. The result is approximately 400 watts of total system power.
That could mean 6 fixtures at around 65 to 80 watts each for recreational courts targeting 400 to 500 lux. For higher-level competition targeting 750 to 1000 lux, fixtures may range from 120 to 150 watts each, resulting in a total system power of 720 to 900 watts.
Even at 800 watts total, modern LED systems are still more energy efficient than older metal halide installations. Traditional 400-watt metal halide fixtures often required 4 to 6 units per court, meaning total connected loads of 1600 to 2400 watts. Switching to LED can reduce energy consumption by 40 to 60 percent while delivering better uniformity and instant start capability.
Considering Light Loss and Real-World Conditions
Real courts are not laboratory spaces. Ceiling color, wall reflectance, and mounting height all influence final lux levels. White walls with reflectance values around 0.75 help bounce light back into the space, effectively improving perceived brightness. Darker finishes absorb more light, which may require higher lumen output to maintain the same lux reading.
Ambient temperature can also affect LED performance. Although indoor courts are generally climate controlled, drivers and heat dissipation still play a role in long-term lumen maintenance.
Over time, even high-quality LEDs experience lumen depreciation. After 50,000 hours, many luminaires maintain around 80 to 90 percent of their initial output. Factoring that into design calculations ensures that the court remains within target lux levels for years without needing early replacement.
Why Uniformity Often Outweighs Raw Power
Here is something that surprises many facility owners. Increasing wattage does not automatically improve playability. A poorly distributed 1000 lux system can feel worse than a well-designed 700 lux system.
If the minimum lux level drops too far below the average, players experience constant visual adaptation as they move around the court. Designers often aim for a minimum-to-average uniformity ratio of 0.7 or higher in competition courts.
Adding one extra fixture, even at moderate wattage, can sometimes improve uniformity more effectively than increasing the wattage of existing fixtures. That is why layout planning and photometric simulation are closely tied to wattage decisions.
Energy Costs Over Time
Let’s look at operating costs. Suppose a court uses 600 watts total and operates 8 hours per day, 300 days per year. That equals 600 watts times 8 hours times 300 days, or 1,440,000 watt-hours annually. Converted to kilowatt-hours, that is 1,440 kWh.
If electricity costs 0.15 USD per kWh, annual lighting cost would be around 216 USD per court. Compare that to a 2000-watt older system running the same hours, which would consume 4,800 kWh and cost about 720 USD annually. The difference over 10 years becomes significant.
So when asking how many watts are needed, it helps to look beyond the installation stage and consider long-term operating cost, maintenance, and performance stability.
Sample Layout Diagrams and Practical Scenarios
 When we design a squash court lighting system, we do not just place fixtures on a ceiling plan and hope for the best. We run full photometric simulations that map out horizontal illuminance on the floor and vertical illuminance on the front, side, and back walls. These simulation reports usually include lux contour maps, false-color renderings, and point-by-point calculation grids at intervals of 0.5 to 1 meter.
For facility owners, these diagrams make everything tangible. Instead of hearing “around 750 lux,” they can see exactly where the 820 lux zone sits, where the minimum 560 lux point falls, and how evenly the light spreads across the 62.4 square meter court. That level of transparency builds trust and reduces surprises after installation.
A Typical 6-Meter Mounting Height Scenario
Let’s take a common setup. Ceiling height is 6 meters from finished floor level. The target average horizontal illuminance is 750 lux for competitive club use. The design uses 6 LED sports luminaires, arranged in two rows of three fixtures, evenly spaced along the length of the court.
In simulation, this configuration often delivers an average illuminance between 720 and 800 lux, depending on lumen output and beam angle. More importantly, the minimum illuminance might sit around 550 to 600 lux, giving a uniformity ratio of approximately 0.7 to 0.75. That aligns well with many indoor sports lighting recommendations.
Vertical illuminance on the front wall in this layout may reach 500 to 650 lux, which helps players clearly track the ball during high rebounds. Without that vertical component, even a bright floor can feel visually inconsistent.
What makes the two-row configuration effective is how it distributes light across both central and peripheral zones. Instead of concentrating brightness along the centerline, it spreads it toward the side walls. That reduces shadowing near the back corners and improves perceived brightness.
Higher Ceiling Example at 7 to 8 Meters
Now imagine the same court inside a larger multi-sport hall with an 8-meter ceiling height. The geometry changes quite a bit.
At 8 meters, if you use the same wide 90-degree beam angle as in a 6-meter design, a significant portion of light will disperse before reaching the playing surface. Some of it may spill onto the ceiling or upper wall areas, reducing effective lux at floor level.
To compensate, designers often choose narrower beam angles such as 60 or 70 degrees. These optics focus light downward, increasing illuminance intensity on the playing surface. Higher wattage fixtures are typically selected as well. Instead of 100-watt luminaires, you might use 150 to 200-watt units depending on target lux levels.
In one typical 8-meter mounting simulation, 6 fixtures at 18,000 lumens each can deliver around 800 lux average with a uniformity ratio above 0.7 when paired with the correct optic. Using the wrong beam angle, however, may drop average lux below 650 and reduce uniformity significantly.
That difference might not be obvious from just looking at fixture specifications. It becomes clear only when reviewing detailed photometric results.
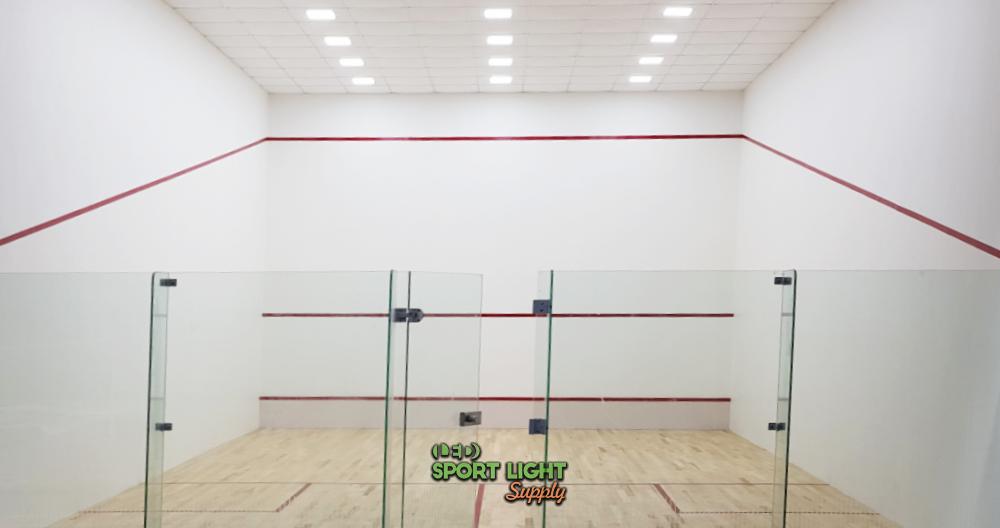
Glass Back Wall and Spectator Seating Considerations
Glass back wall courts add another layer of complexity. The transparency of the wall changes how light reflects within the space. Instead of bouncing back into the court, some light passes through the glass. If there is spectator seating behind it, reflections can create visual distraction or glare.
In these scenarios, glare control and luminaire positioning become even more refined. Designers may slightly adjust fixture tilt angles or select luminaires with improved optical shielding to reduce direct glare toward the glass.
Sometimes, additional vertical lighting emphasis is placed toward the front wall to compensate for reduced reflection from the back. Anti-glare diffusers or low UGR rated fixtures are also commonly specified.
If broadcast cameras are positioned behind the glass, lighting uniformity must be even tighter. Television production typically requires higher vertical illuminance and stable color temperature, often around 4000K to 5000K with a high color rendering index above 80 or 90.
Reading the Numbers with Confidence
When owners review layout diagrams, they usually look for three main figures. Average lux. Minimum lux. Uniformity ratio.
For example, a simulation might show 780 lux average, 560 lux minimum, and a 0.72 uniformity ratio. That tells you the lighting is not just bright but evenly distributed. If the numbers read 820 lux average but 400 lux minimum, the imbalance becomes obvious.
The diagrams also help visualize shadow zones. If contour maps reveal darker patches near the rear service box or side walls, adjustments can be made before installation. Sometimes shifting fixtures by just 300 millimeters can smooth out those inconsistencies.
Seeing these simulations before installation removes uncertainty. Instead of relying on general estimates or previous projects, the design becomes tailored to the specific ceiling height, wall reflectance, and performance requirements of the court.
Ceiling Height – The Hidden Variable
If there is one factor that quietly shapes the entire lighting design of a squash court, it is ceiling height. Two courts can have the same floor dimensions, the same wall color, even the same target lux level, yet behave completely differently if one ceiling is 5.5 meters high and the other is 8 meters.
Ceiling height affects beam angle selection, fixture wattage, spacing layout, glare perception, and even vertical illuminance on the front wall. Change the height, and you change the physics of how light travels inside that enclosed box.
How Lower Ceilings Change the Game
In courts with ceilings around 5.5 to 6 meters, fixtures sit relatively close to players’ line of sight. That proximity increases the risk of discomfort glare, especially when players look upward during high lobs or fast rebounds off the front wall.
Because of that, glare control becomes a bigger focus. Designers often choose luminaires with diffused optics, micro-prismatic covers, or low UGR ratings. Wider beam angles, typically around 90 degrees, are commonly used at lower mounting heights to spread light more evenly across the floor.
Wattage also tends to be more moderate. For example, if targeting 500 to 750 lux in a 6-meter-high court, fixtures in the range of 80 to 150 watts each may be sufficient, depending on lumen output and efficiency. Installing overly powerful fixtures at a low height can create high peak lux directly beneath the luminaire, sometimes exceeding 900 lux while adjacent zones sit at 600 lux. That imbalance reduces uniformity and increases visual strain.
Another detail often overlooked in lower ceilings is reflected glare. When fixtures are close to the ceiling surface, light bouncing off white paint can amplify brightness perception. In some cases, slightly adjusting fixture tilt by a few degrees improves comfort significantly.
What Happens at 7 to 8 Meters
Now raise the ceiling to 7 or 8 meters, and the dynamics shift.
At greater mounting heights, light spreads out more before reaching the playing surface. If you use the same wide 90-degree beam angle designed for a 6-meter ceiling, a noticeable portion of the luminous flux may dissipate outside the intended target area. The result can be lower average lux and reduced efficiency.
To compensate, designers typically select narrower beam angles, often 60 to 70 degrees, to concentrate light downward. Higher wattage fixtures are also introduced. Instead of 100-watt luminaires, you might see 150 to 200-watt units installed to achieve the same 750 to 1000 lux target.
For example, at an 8-meter mounting height, a 6-fixture layout delivering 18,000 lumens per fixture could produce around 800 lux average if optics are properly matched. If the beam angle is too wide, average lux might drop to 650 or below, even though total wattage remains the same.
Spacing must also be recalculated. The spacing-to-mounting height ratio changes as height increases. At 6 meters, fixtures spaced 6 to 7 meters apart may work well. At 8 meters, spacing may need adjustment to maintain a uniformity ratio above 0.7. Ignoring this recalculation often results in darker zones near the back corners or along the side walls.
The Impact on Vertical Illuminance
Ceiling height also influences vertical illuminance on the front wall. In squash, the front wall is constantly in play. If luminaires are too high and beam angles too narrow, the upper section of the wall may receive insufficient lux, even if the floor meets target levels.
In simulations, it is not uncommon to see a well-lit floor at 800 lux while the upper third of the front wall drops to 450 lux. Adjusting optic selection or slightly repositioning fixtures can raise vertical illuminance by 10 to 20 percent without increasing total wattage.
This is why ceiling height is never just a structural detail. It directly shapes how light behaves in three dimensions.
Small Height Differences, Big Performance Shifts
Here is something many people underestimate. A difference of even 0.5 meters in mounting height can noticeably affect lux levels.
Light intensity follows the inverse square law. As distance increases, illuminance decreases proportionally to the square of that distance. While real-world optics modify the exact curve, the principle still applies. Raising a fixture from 6 meters to 6.5 meters can reduce illuminance at floor level by more than 10 percent if no other adjustments are made.
That means a court designed for 750 lux at 6 meters might drop to 670 lux at 6.5 meters using the same fixtures and spacing. Multiply that across the entire court, and uniformity ratios may shift as well.
Measure First, Choose Later
Before selecting any fixture type or wattage, accurate site measurements are non-negotiable. Ceiling height should be measured from finished floor level to the actual luminaire mounting point, not just to the structural slab. Suspended ceilings, cable trays, or ductwork can change effective mounting height.
Professional lighting designers typically request detailed architectural drawings or conduct on-site measurements before finalizing photometric calculations. Without those numbers, even the best fixture specification becomes guesswork.
Choosing the Right Fixture Type
Walk into an older squash club and you can usually tell what kind of lighting system it has within seconds. If the lights take a few minutes to fully brighten and the color looks slightly yellowish, chances are it is running on metal halide. Step into a newer facility and the light feels instantly stable, clean, and evenly spread. That is the LED difference.
Over the past decade, LED technology has almost completely replaced metal halide systems in modern squash courts. The shift is not just about energy savings. It is about performance consistency, visual comfort, and long-term reliability.
LED Versus Metal Halide in Real-World Numbers
Traditional metal halide fixtures commonly operated at 250 to 400 watts per unit. A typical squash court might use 4 to 6 fixtures, resulting in a connected load between 1000 and 2400 watts. On top of that, these systems required several minutes to warm up to full brightness. If the power was interrupted, players often had to wait again for the lamps to restrike.
Lumen depreciation was another challenge. Metal halide lamps can lose 20 to 30 percent of their light output within the first few thousand hours. That means a court initially designed at 750 lux might drop to 550 or 600 lux after a year or two, without anyone changing a single fixture.
LED luminaires behave differently. A high-quality LED sports fixture may deliver 130 to 170 lumens per watt and maintain 80 to 90 percent of its output even after 50,000 hours of operation. For a club running 10 hours per day, 300 days per year, that translates into roughly 3000 hours annually. At that rate, a 50,000-hour rated fixture could operate for more than 15 years before reaching its L80 threshold.
In practical terms, that means fewer lamp replacements, fewer lift rentals, and fewer maintenance interruptions.
The Case for Flicker-Free Drivers
Squash is one of the fastest indoor sports. The ball can exceed 200 kilometers per hour during high-level play. Any instability in light output becomes noticeable during rapid eye movement.
LED systems designed for sports applications typically include flicker-free or low-flicker drivers. These drivers minimize light modulation at high frequencies, often below 1 percent flicker. For training courts, that improves visual comfort. For broadcast environments, it becomes even more relevant.
High-speed cameras used in professional tournaments can capture thousands of frames per second. If lighting flickers at certain frequencies, banding or brightness fluctuations may appear on screen. Selecting luminaires with documented flicker performance data helps avoid these issues.
High Bay LED Fixtures for Traditional Ceilings
In squash courts with ceiling heights between 6 and 8 meters, high bay LED fixtures remain a common choice. These are typically circular or compact luminaires with specialized optics.
High bay models often come in wattage ranges from 100 to 200 watts, delivering anywhere from 15,000 to 30,000 lumens. With proper beam angles, usually between 60 and 90 degrees, they can achieve strong horizontal and vertical illuminance without excessive spill light.
Their compact design also makes them suitable for retrofitting older courts where existing mounting points are already installed. Instead of redesigning the ceiling structure, facility managers can often replace metal halide units with LED high bays while improving both lux levels and uniformity.
Linear Sports Luminaires in Modern Builds
In newer squash court constructions, linear LED sports luminaires are becoming increasingly popular. Rather than acting as a single point source, these fixtures distribute light along an extended housing, creating a smoother wash of illumination.
Because of their elongated shape, linear luminaires often improve uniformity ratios. In photometric simulations, a well-designed linear layout can raise minimum lux values by 10 to 15 percent compared to point-source fixtures at the same total wattage.
Another advantage is glare control. Many linear sports luminaires incorporate diffusers or micro-prismatic optics that soften direct brightness. For players who frequently look upward toward the front wall, this improves visual comfort during long rallies.
From an architectural perspective, linear systems also look cleaner and more integrated, especially in glass-backed courts where aesthetics matter.
Long-Term Operational Perspective
When choosing fixtures, it helps to think beyond installation cost. Consider a club operating 10 hours daily for most of the year. If an older metal halide system consumes 1800 watts and a modern LED system consumes 700 watts, the annual energy difference can exceed 3000 kilowatt-hours.
At an electricity rate of 0.15 USD per kilowatt-hour, that represents about 450 USD in annual savings per court. Over 10 years, the difference becomes significant, even before factoring in reduced maintenance.
LED fixtures rated between 50,000 and 100,000 hours dramatically reduce replacement frequency. Instead of changing lamps every 12 to 18 months, facility managers can focus on cleaning and periodic inspections.
Matching Fixture Type to Court Design
No single fixture type fits every squash court. Lower ceilings may benefit from wide-beam linear luminaires. Higher ceilings might require focused high bay fixtures with tighter optics. Glass back wall courts often demand enhanced glare control.
The right choice depends on ceiling height, target lux level, reflectance of wall surfaces, and whether the court will host televised events.
Selecting the correct fixture type is not just a technical decision. It shapes how the court feels during play. When lighting is stable, evenly distributed, and visually comfortable, players stop thinking about it. They focus on the rally, the strategy, and the rhythm of the game. That is when lighting has done its job well.
Common Lighting Design Mistakes and How to Avoid Them
Even though squash courts are relatively small spaces, lighting mistakes show up fast. Players feel it immediately. The ball looks dull near the back wall, shadows creep into the corners, or the court simply feels “off” even if no one can explain why. Most of these issues come down to a few predictable design errors that can be avoided with proper planning and technical validation.
Underestimating the Required Lux Levels
One of the most common missteps is installing a system designed for recreational use in a court that will host competitive matches. A lighting setup delivering 300 lux might be fine for casual evening play, but once the facility starts hosting league matches or tournaments, complaints usually follow.
At 300 lux, visual clarity drops noticeably during fast rallies. Reaction time can feel slower, especially in deeper court zones. For club-level competition, 500 to 750 lux is a much more realistic target. For higher-level tournaments, 750 to 1000 lux is often expected, depending on governing body recommendations.
The financial impact of under-lighting is real. Retrofitting a completed installation often means replacing fixtures entirely or adding more units. That can double labor costs and disrupt court availability. Spending slightly more on proper lumen output at the design stage usually saves money long term.
Confusing Watts with Performance
Another frequent issue is judging performance purely by wattage. A facility owner might say, “We installed 600 watts, that should be enough.” But wattage alone does not guarantee adequate lux or proper distribution.
Consider two systems. One uses 4 fixtures at 150 watts each, spaced too far apart. The other uses 6 fixtures at 75 watts each, evenly distributed. Both consume roughly 450 to 600 watts total. However, the second layout may achieve a higher minimum lux value and better uniformity ratio.
If the first system produces an average of 700 lux but drops to 350 lux in the corners, its uniformity ratio might fall below 0.5. The second system, even with lower peak lux, might maintain a 0.7 uniformity ratio. From a player’s perspective, the second court will feel more balanced and visually comfortable.
That is why uniformity often matters more than peak brightness. Good lighting is not just strong. It is consistent.
Overlooking Wall Reflectance
Squash is played inside a reflective box. Wall color and surface finish significantly influence lighting performance. White or light-colored walls typically have reflectance values between 0.7 and 0.8. That means 70 to 80 percent of light hitting the surface is reflected back into the space.
If walls are darker, reflectance may drop below 0.5. In that case, more lumens are required to achieve the same perceived brightness. A court designed for 750 lux average with white walls might effectively feel like 600 lux if the walls are painted a darker shade without adjusting lighting output.
Vertical illuminance also depends on reflectance. Poorly considered wall finishes can reduce clarity during front wall rebounds, even if floor lux readings appear acceptable.
Before finalizing fixture selection, designers should confirm wall material, finish type, and reflectance values. These details influence lumen calculations more than many people realize.
Skipping Professional Lighting Simulation
Perhaps the most avoidable mistake is skipping photometric simulation altogether. Some projects rely on rule-of-thumb spacing or copy previous installations without verifying site-specific conditions.
Professional lighting simulations generate detailed reports showing average lux, minimum lux, maximum lux, and uniformity ratios across the entire court. Many reports use grid spacing of 0.5 meters, creating dozens of calculation points. That data reveals potential shadow zones before installation begins.
For example, a simulation might show an average of 780 lux but reveal a 420 lux pocket near the rear service box. Adjusting fixture spacing by even 300 millimeters could improve that minimum to 550 lux without increasing total wattage.
Reputable lighting suppliers provide photometric files, often in IES format, and full simulation reports. These documents form part of a transparent design process, especially when courts must comply with sports federation guidelines or broadcast standards.
Designing Without Real Measurements
Assumptions can be expensive. Ceiling height differences of even half a meter can reduce floor illuminance by more than 10 percent if fixtures are not recalculated. Mounting to a structural slab versus a suspended grid changes effective height. Cable trays and ductwork can alter positioning.
Experienced lighting consultants begin with accurate architectural drawings or on-site measurements. They verify mounting height, ceiling reflectance, wall finishes, and target lux levels before recommending fixture types.
They also consider long-term factors such as lumen depreciation, maintenance factors, and driver performance. Instead of designing purely for day one performance, they plan for year five and year ten.
Relying on Rough Estimates Instead of Standards
Another subtle mistake is ignoring recognized sports lighting recommendations. Competitive squash often follows guidelines referenced by the World Squash Federation or other national governing bodies. These standards outline recommended lux ranges, uniformity ratios, and sometimes glare control requirements.
Designing outside these benchmarks may lead to compliance issues if the facility later applies to host sanctioned events.
Experienced consultants align designs with relevant standards from the beginning. They use measurable targets rather than subjective judgments like “bright enough.”
A Court That Feels Effortless
When lighting is done properly, players do not talk about it. They just play. The ball is clear, the walls are evenly lit, and there are no distracting shadows.
Designing squash court lighting involves balancing spacing, wattage, glare control, vertical illumination, and smart integration. With proper calculations, a typical competition court may operate efficiently at 500 to 800 total system watts while delivering professional-level visibility.
If you are planning a new squash court or upgrading an existing one, working with a team experienced in sports lighting design can save time, energy, and long-term cost. We regularly provide lighting simulations, wattage calculations, and tailored layout proposals based on actual site dimensions and performance targets. Feel free to reach out to us for a detailed consultation. Let’s design a court where every rally is seen clearly and played with confidence.