
Baseball fields need strong, well-distributed lighting so players can track fast-moving balls, spectators can follow the action, and games can continue safely after sunset. But there is a catch – when LED floodlights are too bright, poorly aimed, or installed without considering the surrounding environment, they can create uncomfortable glare and send unwanted light into nearby homes.
For baseball fields located close to residential neighborhoods, glare is more than a visual annoyance. It can affect nighttime comfort, disturb people inside their homes, and lead to complaints from neighbors. Fortunately, a well-planned lighting system can provide excellent visibility without turning the surrounding area into a sea of unwanted light.
The good news is that reducing glare does not necessarily mean installing fewer lights or sacrificing playing conditions. The right combination of LED optics, barn doors, narrower beam angles, suitable pole placement, and intelligent lighting controls can make a noticeable difference. Let’s look at what causes baseball field lighting glare and how to control it in a practical, cost-conscious way.
What Causes Glare in Baseball Field Lighting?
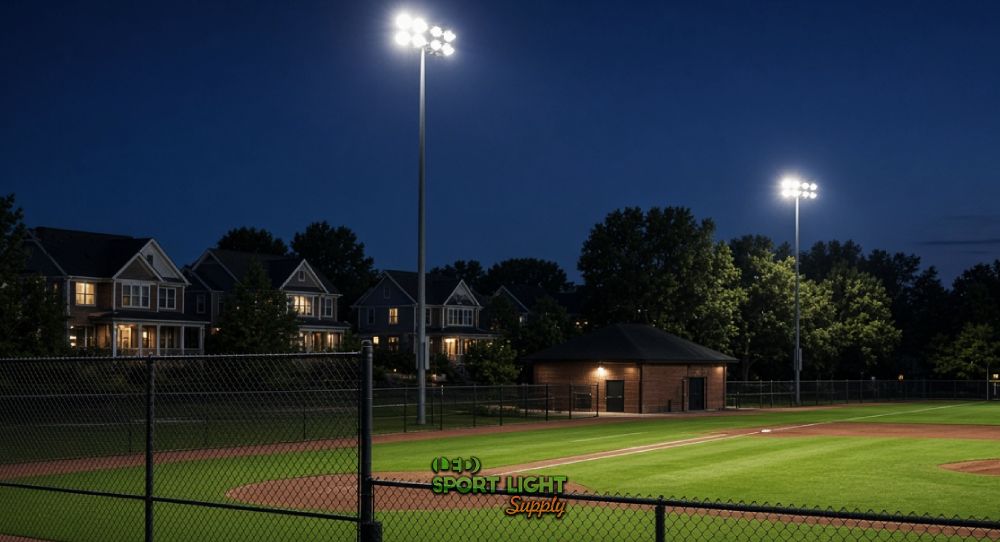
Glare occurs when a light source creates excessive brightness in someone’s field of view, making it uncomfortable to look at or harder to see surrounding objects. On a baseball field, this can happen when players look toward an elevated floodlight while tracking a fly ball, when spectators face exposed LED fixtures, or when light spills beyond the field toward nearby properties.
LED floodlights are widely used for sports lighting because they offer high luminous efficacy, long service life, and flexible optical designs. However, LEDs can produce intense brightness from a relatively small emitting area. If the fixture’s optics and mounting angle are poorly selected, the concentrated light can cause discomfort even when the overall field illumination is within the intended range.
Direct Glare from High-Intensity LED Floodlights
Direct glare occurs when someone can see a bright light source without sufficient shielding or optical control. For example, a batter looking toward the outfield may see an exposed floodlight mounted above the field. The brightness can make it harder to follow the ball, particularly when the ball travels through a dark portion of the sky.
The problem is not always that the fixture produces too many lumens. A floodlight rated at 50,000 lumens may perform well when equipped with suitable optics and aimed correctly, while a lower-output fixture can still cause discomfort if its light source is directly visible from an unfavorable angle.
Fixture luminance, light distribution, mounting geometry, and viewing direction all influence glare. That’s why simply choosing a lower-wattage LED light is not always the best fix.
Poor Aiming and Excessive Light Output
A floodlight can produce plenty of light but still illuminate the wrong places. If a fixture is aimed too high or points toward the edge of the field rather than its intended target, part of the output may reach surrounding houses, roads, or spectator areas.
Excessive light output can make matters worse. For example, operating a field at 100% output when a lower setting would satisfy the requirements for routine practice creates unnecessary brightness and energy consumption.
A proper lighting design accounts for the field’s dimensions, mounting heights, fixture positions, beam angles, and required illumination. Instead of increasing brightness whenever a dark patch appears, the designer should check whether a different aiming angle or optical distribution would solve the problem more effectively.
Incorrect Beam Angles and Light Distribution
Beam angle describes the angular spread of light emitted by a fixture. A narrower beam concentrates light into a smaller area, while a wider beam spreads it over a larger area.
Neither option is automatically better. A narrow beam may work well for a distant target, but it can create a bright hotspot if aimed incorrectly. A wide beam may provide smoother coverage in some locations, but it can also send more light toward nearby houses if the fixture is poorly positioned.
For this reason, beam angle should match the distance, target area, pole height, and surrounding environment. Baseball field lighting commonly uses a combination of optical distributions to cover the infield, outfield, and other playing zones.
Reflected Light from the Field and Surrounding Surfaces
Not all glare comes directly from a fixture. Light can also reflect from bleachers, metal structures, nearby windows, pavement, and other surfaces. The amount of reflection depends on the material, surface finish, and angle of incidence.
A large glass façade facing a brightly illuminated field, for instance, may reflect enough light to become visually distracting at night. While changing the fixture optics will not eliminate every reflection, better aiming and reduced spill can limit the amount of light reaching reflective surfaces in the first place.
How Does Glare Affect Residential Areas Near Baseball Fields?
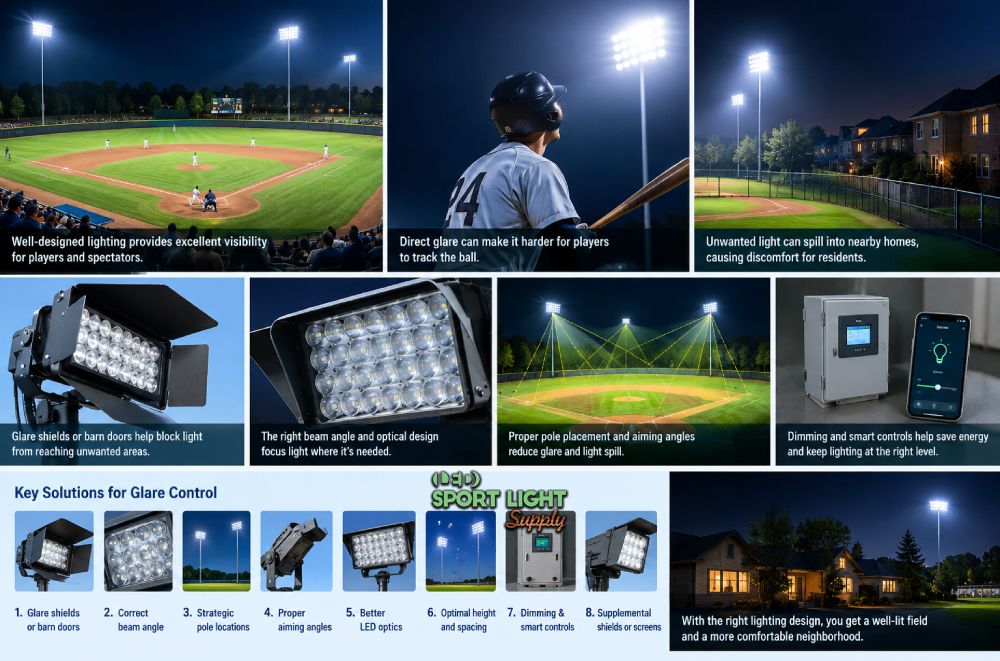
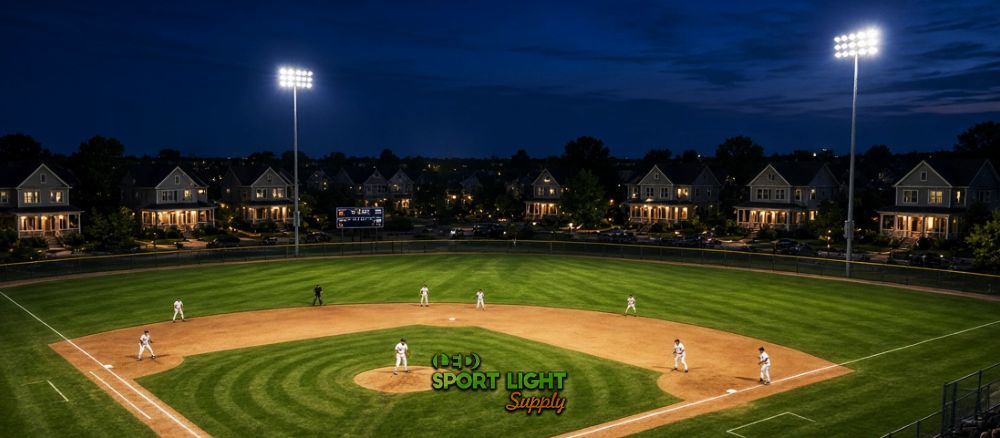
Residential areas deserve particular attention because unwanted light can reach spaces that people expect to remain comfortable and relatively dark at night. The problem is not limited to houses directly beside the outfield. Apartment buildings, upper-floor bedrooms, balconies, gardens, and shared outdoor areas may all be exposed to elevated floodlights.
Light Entering Windows, Gardens, and Balconies
The position of a home relative to a lighting pole can have a major influence on its exposure. A fixture aimed across the field may send a portion of its beam toward an upper-floor window, even if the ground-level garden receives very little direct light.
This is one reason why a site assessment should consider building height as well as horizontal distance. If a nearby apartment building has eight floors, measuring light only at ground level may overlook the areas most affected by glare.
A photometric plan can estimate illuminance at selected points on surrounding façades and property boundaries. After installation, nighttime measurements can help confirm whether the finished system performs as expected.
The Effect on Privacy and Outdoor Enjoyment
A brightly lit sports field can change the nighttime atmosphere of nearby homes. Residents may find it less comfortable to sit on a balcony, relax in a garden, or open their curtains when a floodlight shines directly toward the property.
The issue is often the direction of the light rather than the mere presence of a sports facility. Carefully controlled floodlights can illuminate the playing surface while leaving neighboring outdoor spaces relatively undisturbed.
Shielding, precise aiming, suitable pole placement, and operating schedules all help reduce unwanted exposure. These measures can also make the facility a more considerate neighbor without requiring the complete replacement of its lighting system.
Why Property Boundaries Should Be Considered During Design
The distance between a lighting pole and a nearby house is only one part of the picture. The designer also needs to know where the field boundaries sit, how high the fixtures are mounted, which direction they face, and how far the main beam extends.
For example, a pole placed 20 meters from a residential boundary may create manageable spill when fitted with appropriate optics. A pole placed farther away could still cause discomfort if its floodlights point directly toward bedroom windows.
The most useful approach is to evaluate the entire lighting arrangement rather than rely on a single minimum-distance rule. When space is limited, a combination of shielding, alternative fixture positions, and carefully selected beam distributions may provide a practical solution.
Ways to Reduce Glare in Baseball Field Lighting
Reducing glare works best when several design measures complement one another. A barn door may block unwanted light in one direction, but it cannot compensate for every problem caused by poor aiming or unsuitable pole placement. Likewise, a narrow beam angle may help control spill, but only when the fixture is matched to its intended target.
The following approaches address the main causes of glare while helping maintain the illumination needed for safe baseball play.
Install Barn Doors or Glare Shields on LED Floodlights
Barn doors are adjustable or fixed shielding accessories designed to block light in selected directions. Depending on the fixture design, they can help prevent unwanted light from reaching spectators, nearby roads, houses, or other sensitive areas.
For baseball field applications, barn doors can be useful when a floodlight illuminates the playing surface adequately but still sends light beyond the intended area. A compatible visor or glare shield may provide a similar benefit by restricting the fixture’s visible light output from certain viewing positions.
However, not every LED sports floodlight supports traditional barn doors. High-powered outdoor fixtures may require manufacturer-approved shields or specialized accessories that can withstand wind, rain, heat, and outdoor corrosion. Improvised attachments can interfere with cooling, damage the fixture, or create structural problems.
The key is to choose an accessory designed for the exact luminaire and confirm its effect through photometric analysis. A properly selected shield can reduce unwanted light without requiring the entire lighting system to be replaced, although the result depends on the original fixture and installation.
Choose a Suitable Narrow Beam Angle
Beam angle selection is another effective way to control where light goes. Narrower distributions can concentrate output on distant sections of the field, while wider distributions may be more appropriate for closer areas that need broader coverage.
For example, a floodlight mounted 25 meters above the ground and aimed at a target area far across the outfield may require a different optical distribution from a fixture illuminating a nearby infield section. The exact choice depends on pole position, aiming angle, target dimensions, and required illumination.
The table below illustrates how beam angles influence light distribution. These are general examples rather than universal baseball field specifications.
| Beam angle | Typical distribution | Design consideration |
|---|---|---|
| 10° to 20° | Narrow, concentrated beam | Useful for selected distant targets, but aiming needs careful control |
| 20° to 40° | Medium beam | Can suit a range of field zones, depending on mounting geometry |
| 40° to 60° or wider | Broad distribution | May cover larger or nearer areas, with greater attention to spill control |
A narrower beam is not automatically more comfortable. It may produce higher local brightness and uneven illumination if the design is poorly calculated. The goal is to select optics that deliver the required light to the intended playing area while limiting output beyond it.
When choosing LED floodlights, request the manufacturer’s photometric files and examine the light distribution rather than relying only on the advertised beam angle. Two fixtures with the same nominal angle can produce different results because their optical systems are not identical.
Increase the Distance Between Lighting Poles and Nearby Houses
Increasing the separation between lighting poles and residential properties can help reduce the amount of light reaching homes. Greater distance can also provide more flexibility when adjusting fixture positions and aiming angles.
However, moving a pole farther from a house does not guarantee lower glare. If the pole must be positioned at an awkward angle relative to the field, the fixtures may need to be aimed more aggressively toward the playing surface. That could increase direct glare or create uneven illumination.
The design should therefore consider pole locations and fixture optics together. A preliminary site plan can compare alternative positions and estimate their effects on field coverage and residential boundaries before any foundations are built.
For existing facilities, relocating poles may be expensive because it can involve new foundations, electrical cabling, underground services, and structural work. Before taking that step, evaluate whether revised aiming, suitable shields, or a different optical distribution can solve the problem at a lower cost.
Optimize Floodlight Aiming and Mounting Angles
Correct aiming is one of the most practical ways to reduce glare without changing the entire system. Each floodlight should direct its output toward its assigned section of the field, with minimal unnecessary light above the horizon or beyond the target area.
The ideal mounting angle depends on the pole height, field dimensions, and fixture characteristics. Aiming all fixtures at the same angle is rarely the right approach because different poles illuminate different zones.
For example, a fixture serving the near infield may need a different orientation from one covering the far outfield. Adjusting each luminaire individually can improve uniformity while reducing the amount of light directed toward spectators or neighboring properties.
Aiming should be verified after installation, preferably during nighttime commissioning. The installer can compare actual field measurements with the design calculations and make controlled adjustments where needed. Even small orientation changes can influence the distribution of light, so the result should be checked both on the field and around its perimeter.
Select LED Fixtures with Better Optical Control
The optical design of an LED floodlight determines how effectively it distributes light. Fixtures designed for sports applications may offer multiple beam distributions, glare-control accessories, carefully shaped lenses, and housing designs that limit unwanted light at particular viewing angles.
When comparing products, avoid judging them by wattage alone. A 1,000 W fixture with well-designed optics may direct light more effectively than a less suitable fixture with similar power consumption. The same applies to luminous flux – more lumens do not necessarily produce better visibility.
Review the manufacturer’s photometric data, light distribution diagrams, and compatibility with shielding accessories. If the field is close to residential buildings, ask for calculations that show both the expected field illumination and the predicted light levels outside the site.
A well-selected luminaire should fit the lighting design rather than force the designer to work around its limitations. This approach often provides a better long-term result than installing powerful fixtures first and trying to correct the spill later.
Use Suitable Pole Heights and Spacing
Pole height and spacing affect illumination uniformity, fixture aiming, and glare exposure. Poles that are too low may require more aggressive aiming or additional fixtures to reach distant parts of the field. Poles that are taller may improve coverage geometry in some layouts, but they also introduce structural, foundation, access, and installation costs.
There is no single pole height that works for every baseball field. A small community diamond, a high school field, and a large competition venue have different lighting requirements and site constraints.
Pole spacing matters as well. If the poles are too far apart, the design may produce dark areas between lighting zones. If they are poorly positioned, fixtures may need to direct light at unfavorable angles to reach the required targets.
A photometric simulation helps compare different combinations of pole height, spacing, fixture output, and beam angle. This can identify a layout that achieves the target illumination without unnecessarily increasing the number or power of the floodlights.
Add Dimming and Smart Lighting Controls
Lighting controls allow the facility to adjust output according to the activity taking place. A field used for competitive games may need a different lighting setting from one used for routine practice or maintenance.
For example, if a lighting system is designed to support several operating modes, it may use full permitted output for scheduled games, a lower approved setting for training, and a reduced maintenance setting when only part of the field is occupied. The exact levels must be confirmed through photometric calculations to ensure that visibility and safety requirements remain satisfied.
Dimming can reduce energy use as well as unwanted light. Suppose a field uses 40 LED floodlights rated at 1,000 W each. The total connected lighting load is 40 kW. Reducing output to 70% may bring power consumption close to 28 kW if the fixtures and drivers support proportional dimming. Actual savings depend on driver efficiency, control characteristics, and system losses.
Timers and automatic shutoff schedules can also prevent the field from remaining fully illuminated after activities finish. Separate control zones allow operators to switch off unused areas rather than keeping every fixture on throughout the evening.
Install Supplemental Shields or Screens Where Needed
Some sites have a small number of particularly sensitive areas, such as a row of bedroom windows facing the outfield or a road running alongside one boundary. In these cases, supplemental shielding may help reduce unwanted light.
Depending on the site, solutions may include manufacturer-approved fixture shields, localized screens, or landscape features that provide some visual separation. Each option has limitations. A screen may block light traveling at one angle but have little effect on light entering upper-floor windows, while dense landscaping may take years to reach its intended size.
Physical barriers must also comply with fire, structural, visibility, and site-access requirements. They should not obstruct players’ views, interfere with emergency access, or create hazards around the field.
Where possible, correct the light at its source first. Fixture optics, aiming, and output control are usually more direct ways to manage spill than adding barriers after installation.
How to Measure and Evaluate Glare and Light Spill
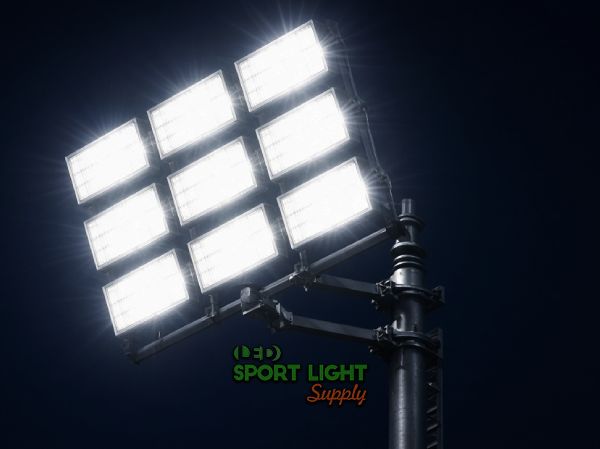 Glare should be evaluated from the perspective of the people affected, not just from the middle of the baseball field. A lighting system can appear comfortable from the pitcher’s mound while producing direct glare from a nearby road or bedroom window.
A combination of photometric modeling, nighttime observations, and light measurements gives a clearer picture of the problem. It also helps facility operators choose corrective measures based on evidence rather than guesswork.
Conduct a Nighttime Lighting Assessment
A nighttime assessment should identify where glare occurs, which fixtures contribute to it, and when the problem is most noticeable. The review can include the infield, outfield, spectator seating, entrances, parking areas, nearby roads, and residential boundaries.
Observations should be made from several relevant viewpoints. A bright fixture may be unobtrusive from one direction but directly visible from another, particularly when a person is looking toward the field from a higher floor.
Recording the affected locations, operating conditions, and fixture settings helps establish a baseline. After adjustments, the same locations can be checked again to see whether the changes have reduced the problem.
Measure Illuminance at Property Boundaries
A suitable light meter can measure illuminance in lux at selected locations around the field. Depending on the complaint and local requirements, measurements may be taken at ground level, near windows, or on relevant vertical surfaces.
For example, if a neighboring property reports unwanted light, measurements could be taken at the boundary and at an accessible location representative of the affected window. The exact measurement procedure should follow applicable local standards and account for background lighting.
It is also useful to record whether the field lights are operating at full output, in a dimmed mode, or during a specific game or practice session. This information makes it easier to compare measurements fairly and determine whether operating controls could help.
Verify Results After Installation
Once the system is installed or adjusted, the contractor should verify that the playing area receives the required illumination and that unwanted light has been reduced as planned. This process may include checking fixture orientation, measuring illuminance at selected field points, and inspecting sensitive locations outside the site.
If the measurements reveal a problem, the installer can make targeted corrections rather than changing the whole system. In some cases, a small aiming adjustment will be enough. In others, the result may indicate that a shield, alternative beam distribution, or different operating setting is needed.
Documenting the final settings also helps with future maintenance. If a fixture is replaced or moved later, the original aiming and measurement records provide a useful reference.
How to Choose a Glare-Reduced LED Lighting Solution for a Baseball Field
Selecting a suitable LED lighting system begins with understanding the site. Field dimensions, competition level, pole locations, nearby buildings, operating hours, and local lighting restrictions all influence the choice of fixtures and controls.
Rather than starting with a target wattage, define the performance the system needs to achieve. That includes the required field illumination, uniformity, acceptable glare, and control of light outside the property.
Review Photometric Data and Optical Options
Request photometric files and distribution diagrams for the proposed fixtures. These files allow a lighting designer to model how light will reach the field and where it may spill beyond the intended area.
Check whether the manufacturer offers several optical distributions, compatible visors or shields, dimming options, and suitable mounting accessories. For a field near residential buildings, ask the supplier to evaluate sensitive boundaries and building façades as part of the design.
The quality of the optical system matters more than a product description that simply promises powerful illumination. A fixture should be selected because it performs well in the intended layout, not because its lumen output or wattage looks impressive on a specification sheet.
Consider Installation and Lifetime Operating Costs
The initial purchase price is only one part of the overall cost. Pole foundations, electrical infrastructure, lifting equipment, installation labor, controls, commissioning, and future maintenance can all influence the budget.
A more efficient fixture may cost more upfront but reduce electricity consumption over time. Likewise, a fixture with better optical control may reduce the need for additional shielding or later corrective work.
For a fair comparison, evaluate the estimated total cost of ownership over a defined period, such as 10 years. Include projected operating hours, the local electricity rate, maintenance assumptions, and any expected component replacement. Use the manufacturer’s warranty and technical data to support those assumptions rather than relying on generic lifespan claims.
Work with an Experienced Sports Lighting Designer
Sports lighting design involves more than selecting floodlights and mounting them on poles. The designer needs to balance the visual requirements of the game with electrical capacity, structural limitations, local regulations, and the needs of nearby residents.
An experienced designer can assess whether the existing equipment is suitable for adjustment or whether a new layout would provide a better result. They can also compare different fixture distributions and pole configurations before the project moves into installation.
Ask for a documented lighting proposal that explains the chosen fixtures, predicted field illumination, expected uniformity, glare-control measures, and estimated spill-light levels. A clear design gives facility owners a more reliable basis for comparing suppliers and evaluating the finished installation.
How Much Does It Cost to Reduce Glare in Baseball Field Lighting?
The cost of glare reduction varies depending on the size of the field, the existing lighting system, the number of poles, and the severity of the problem. A facility that needs minor aiming adjustments may spend much less than one that requires new fixtures, replacement poles, or extensive electrical work.
For an existing field, the sensible first step is to identify the source of the glare. Otherwise, an operator might spend thousands of dollars on new equipment when a smaller adjustment could have addressed much of the problem.
The following figures are illustrative planning estimates in US dollars, not supplier quotations or verified market averages. Actual costs vary by location, product specifications, labor rates, access conditions, and project scope.
| Glare-reduction measure | Illustrative cost range (US$) | Main cost factors |
|---|---|---|
| Aiming adjustments | $500 to $3,000 | Site access, labor, number of fixtures |
| Photometric assessment | $1,000 to $5,000 | Field size, modeling detail, measurement scope |
| Compatible shields or visors | $50 to $300 per fixture | Fixture compatibility, material, design |
| Dimming and control upgrades | $1,000 to $10,000+ | Drivers, control hardware, wiring, integration |
| LED floodlight replacement | $500 to $2,500+ per fixture | Output, optics, accessories, product quality |
| Pole relocation or major redesign | $5,000 to $30,000+ per pole | Foundations, cabling, structural work, site conditions |
These figures are intended to help with early budgeting. A complete project quotation should identify whether equipment, installation, lifting equipment, electrical work, commissioning, taxes, and engineering services are included.
Compare the Cost of Adjustments with Fixture Replacement
Suppose an existing field has 24 LED floodlights and several fixtures are sending unwanted light toward nearby houses. If the problem can be addressed through aiming and shielding, the cost may be substantially lower than replacing all 24 luminaires.
For illustration, assume that a contractor charges $1,500 for an aiming assessment and adjustment, while compatible shields cost $150 per fixture for 10 affected fixtures. The estimated total would be $3,000 before any additional labor or access costs.
By comparison, replacing 24 fixtures at an illustrative equipment cost of $1,000 each would mean $24,000 in equipment alone, excluding installation, electrical work, and commissioning. Replacement may still make sense if the existing equipment is outdated or inefficient, but it should not be the automatic first choice.
The best decision comes from comparing the cost of each option with its expected performance. A photometric assessment can help determine whether the existing fixtures can meet the field’s requirements after adjustment or whether new optics and equipment are needed.
Estimate Energy Savings from Dimming
Energy costs provide another reason to consider lighting controls. The potential savings depend on the connected load, operating hours, electricity tariff, and actual power reduction achieved through dimming.
Consider a baseball field with 40 floodlights rated at 1,000 W each. At full output, the connected lighting load is 40 kW. If the lights operate for 5 hours per day over 200 days per year, annual operating time is 1,000 hours.
The annual energy consumption at full power would be:
40 kW × 1,000 hours = 40,000 kWh.
If the average lighting load can be reduced by 30% during eligible operating periods, the estimated annual energy saving would be 12,000 kWh. At an illustrative electricity rate of US$0.15 per kWh, that would equal US$1,800 per year.
Actual results will depend on whether the system can maintain the required illumination at the lower setting and whether the operating schedule allows those savings. A dimming percentage does not always translate directly into the same percentage of power reduction, so the fixture’s technical data should be checked.
A Better-Lit Field Can Be a Better Neighbor
Reducing glare in baseball field lighting starts with controlling where the light goes, not simply reducing how much light the field receives. Appropriate beam angles, compatible barn doors or shields, precise aiming, well-planned pole placement, and dimming controls can work together to maintain good visibility while reducing unwanted light around the site.
For fields near residential areas, the best results usually come from considering nearby homes and roads at the design stage. A photometric assessment can help identify problem areas, compare practical solutions, and avoid unnecessary spending on equipment that does not address the real cause of the glare.
Every baseball field has its own layout, lighting requirements, and surrounding environment, so the right solution depends on the details of the project. If you are planning a new installation or looking to improve an existing LED sports lighting system, contact our team for a tailored consultation. We can help you assess your site, explore suitable glare-control options, and develop a lighting solution that supports clear visibility on the field while showing greater consideration for the surrounding community.