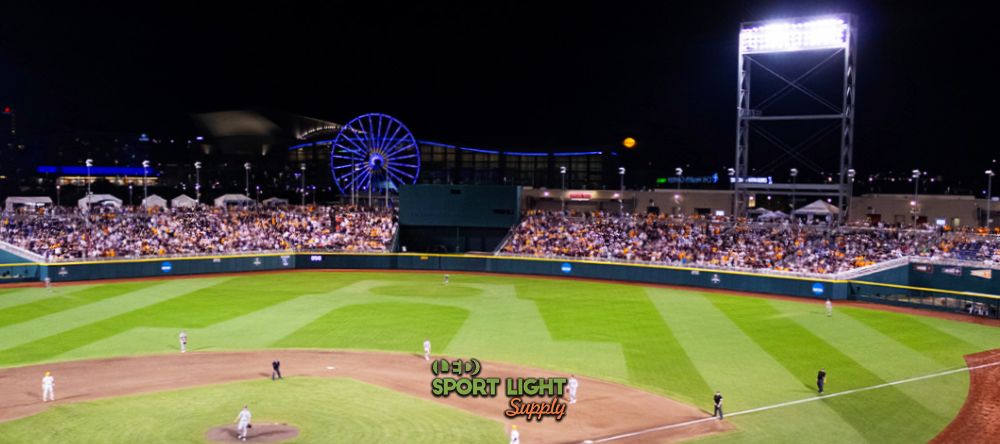
A baseball field under good lighting feels alive. The ball stays visible off the bat, players track fly balls with confidence, and fans can actually see what they paid for. But older lighting systems often struggle with uneven brightness, high energy bills, and constant maintenance issues. Upgrading field lighting is not just about swapping fixtures. It’s a process that blends planning, design, technology, and long-term thinking.
A well-thought-out upgrade can reduce energy use by 50 to 70 percent, improve visibility across the infield and outfield, and cut maintenance calls for years. Rushing the process, on the other hand, often leads to glare complaints, dark spots, and wasted budget. The following steps walk through how to approach a baseball field lighting upgrade in a way that feels practical and realistic, not overengineered.
Step 1 – Evaluate Current Lighting Conditions
What Is Really Happening on the Field at Night?
Before any upgrades are discussed, it makes sense to slow down and take a hard look at what the field lighting is actually doing once the sun goes down. A lot of baseball fields are still running on metal halide or high-pressure sodium systems that went up 15, sometimes even 25 years ago. On paper, those fixtures may still be “working,” but in real life, they are usually far from their original output. It’s common to see light depreciation of 40 percent or more over time, meaning a fixture that once delivered 1,500 watts of punch might now feel closer to 800 or 900 watts in usable brightness.
Measuring What Players and Fans Really See
A proper evaluation usually starts with on-site light level testing, not guesswork. Using a light meter, readings are taken in foot-candles or lux across key playing zones, including the infield dirt, grass areas, pitcher’s mound, batter’s box, outfield alleys, and even the stands. For context, a recreational or youth baseball field often operates comfortably around 25 to 30 foot-candles in the infield, while high school fields tend to aim closer to 45 to 50 foot-candles. Varsity or tournament-level fields may push beyond that.
When readings jump from 50 foot-candles near home plate down to 20 in the outfield corners, players feel it immediately. Outfielders struggle with depth perception, and hitters deal with changing brightness as the ball travels. Inconsistent illumination is one of the fastest ways to make a field feel harder to play on, even if the average number looks fine on paper.
Evaluating Uniformity and Shadows
It’s not just about brightness. Uniformity across the field can make a huge difference in gameplay. Uneven lighting creates shadows, especially along baselines, foul territory, or the outfield gaps. Players often have to squint or adjust their position constantly, which can affect performance and safety. Measuring minimum versus average light levels helps identify problem areas that need attention.
Step 2 – Understand Lighting Standards and Regulations
Which Rules and Guidelines Shape the Upgrade
Baseball field lighting follows more structure than many people realize. Different levels of play come with different expectations, often guided by organizations like the Illuminating Engineering Society (IES) or regional athletic associations. These guidelines influence target light levels, uniformity ratios, and glare limits.
Municipal fields add another layer. Zoning rules, environmental regulations, and neighborhood agreements often control how much light can spill beyond the field. In residential areas, spill light limits as low as 0.3 to 0.5 foot-candles at property lines are becoming more common. Older systems weren’t built for these limits, which explains why neighbors sometimes complain about lights shining into windows.
Managing Glare and Light Trespass
Glare affects gameplay more than most realize. Pitchers facing outfield lights or batters staring toward poorly aimed fixtures can lose track of the ball, which is dangerous and frustrating. Modern standards focus on vertical illumination, glare ratings, and spill control, not just raw brightness.
Light trespass has become a bigger concern as LED upgrades increase. Communities pay attention to how field lighting interacts with streets, parking lots, and homes. Addressing this early helps avoid redesigns, complaints, or mandated dimming after installation.
Electrical and Structural Considerations
Lighting regulations don’t stop at brightness. Electrical codes often require grounding upgrades, surge protection, or updated control systems when new fixtures are installed. Poles taller than 60 or 70 feet may need structural verification to confirm they can handle modern fixture weights and wind loads. Foundations poured decades ago might no longer meet current standards.
Accounting for Local Weather and Usage Patterns
Another important factor is weather and seasonal usage. Fields in windy regions may need poles engineered to withstand gusts over 80 mph, while snowy areas may require reinforced mounts to handle ice accumulation. Usage patterns also affect system design. Fields hosting 10–15 night games per month need more durable, reliable systems than fields used only a few times a week. Factoring these variables early keeps the lighting consistent, safe, and long-lasting.
Step 3 – Define Performance Goals
Defining What the New Lighting Should Deliver
One of the easiest ways to derail a lighting upgrade is to skip goal-setting. Without clear targets, decisions get made on price alone, and the end result often feels underwhelming. Some fields mainly want to cut energy bills. Others are chasing better visibility for competitive play, streaming games, or hosting tournaments.
Defining performance goals helps clarify what success looks like. Is the aim to reach 50 foot-candles across the infield with a uniformity ratio of 2.0 or better? Is glare reduction a top concern because of pitcher sightlines? Are there plans to add evening practices five nights a week instead of two?
Balancing Brightness and Uniformity
Brightness grabs attention, but uniformity quietly drives playability. A field averaging 50 foot-candles but dipping to 18 in the baselines will still feel uneven. Many players prefer a smoother spread, even if the average number drops slightly. Consistent lighting helps with reaction time, tracking fly balls, and overall comfort during long games.
Modern LED systems make it easier to fine-tune this balance. Optics can be selected to target specific zones, reducing hot spots while lifting darker areas. Clear goals help designers use those tools effectively.
Factoring Game Type and Field Usage
Different types of games and events require slightly different lighting. High school varsity games often need brighter, more uniform light than recreational or youth leagues. Fields hosting night tournaments, college showcases, or televised games may also require higher standards for glare control and vertical illumination. Defining these factors early ensures the system meets the right expectations.
Setting Realistic Energy and Cost Targets
Energy savings are often a big motivator. Replacing 1,500-watt metal halide fixtures with 600-watt LED sports lights can cut power usage by 60 to 65 percent. On a field running 10 to 12 fixtures for 1,000 to 1,200 hours per year, that can translate into thousands of dollars saved annually.
Beyond energy, goals may include reduced maintenance, fewer lamp replacements, and better control options like dimming or scheduling. When owners, designers, and installers all understand these targets from the start, decisions stay aligned, and the final system feels intentional rather than improvised.
Step 4 – Choose the Right Lighting Technology
Understanding Today’s Baseball Field Lighting Options
When people talk about upgrading baseball field lighting, LED almost always comes up first, and for good reason. Modern LED sports lighting systems behave very differently from older metal halide setups. They turn on instantly, so there’s no 10 to 15 minute warm-up period before a game. They also hold their brightness much better over time. After 10 years of use, many LED fixtures still deliver over 80 to 90 percent of their original output, while traditional lamps often drop well below that mark much earlier.
Another big advantage is control. LED fixtures are built with precise optics that shape the light instead of just blasting it outward. This makes it easier to light the infield dirt, grass areas, and warning track without washing the entire neighborhood in glare. Better optical control usually means better playability, not just higher numbers on a spec sheet.
Not All LED Fixtures Are Built for Baseball
Some LED fixtures on the market were originally designed for parking lots, roadways, or warehouses. While they might look bright enough, they often struggle on a baseball field. These fixtures tend to produce wide, unfocused beams, which can create glare in the batter’s box and leave darker patches in the outfield.
Sports-specific LED luminaires are built differently. They use narrow and asymmetric beam patterns that can throw light 250 to 350 feet from the pole to the outfield fence. That long-throw capability is especially useful for full-size fields where the outfield depth stretches past 300 feet. Using fixtures designed specifically for sports lighting reduces the need to overpower certain areas just to reach distant zones.
Understanding Color Temperature and Visual Comfort
Color temperature plays a bigger role than many people expect. Most baseball fields land somewhere between 4,000K and 5,700K. At the lower end, the light feels a bit warmer and easier on the eyes. At the higher end, the field appears brighter, and the white baseball tends to stand out more clearly against the grass and sky.
Many high school and competitive fields lean toward 5,000K or slightly above because it improves contrast and visibility. Going too high, though, can feel harsh, especially during long games. Matching color temperature to how often the field is used and who’s playing on it keeps the lighting comfortable instead of overwhelming.
Step 5 – Plan Pole Placement and Mounting Heights
Pole Placement and Its Impact on Lighting Quality
Pole placement quietly shapes how a field feels under the lights. Even the best fixtures can struggle if poles are in the wrong spots. Fields with poorly placed poles often deal with shadows along the baselines, uneven coverage in the outfield gaps, or glare aimed straight into hitters’ and pitchers’ sightlines.
Reusing existing poles can save a noticeable chunk of the budget, but only if those poles still make sense for modern lighting. Older layouts were often designed around metal halide fixtures, which behave differently than LEDs. A pole that worked fine 20 years ago might now sit too low or too close to the field for today’s optical designs.
Finding the Right Height for the Field
Most baseball field poles fall between 60 and 80 feet, depending on the size of the field and the level of play. Smaller youth fields may function well at the lower end of that range, while high school or tournament fields often benefit from taller poles.
Shorter poles usually need higher wattage fixtures to reach the outfield, which can create hot spots and glare closer to the infield. Taller poles allow fixtures to aim downward at steeper angles, spreading light more evenly. Height often trades a bit of upfront cost for better uniformity and comfort during games.
Considering Pole Layout Patterns
It’s not just about height—how poles are spaced around the field matters. Common patterns include four poles on the corners, six-pole arrangements along the baselines, or even eight poles for full-size tournament fields. The layout affects shadow reduction, glare control, and coverage in foul territory. Thinking about layout early prevents costly adjustments later.
Step 6 – Conduct a Professional Lighting Design
How Does the Plan Look Before Anything Is Installed?
A professional lighting design is where ideas turn into something concrete. Instead of guessing how the field might look, designers create a digital model showing how light will fall across every part of the field. Using specialized lighting software, they simulate fixture output, beam angles, mounting heights, and even spill light beyond the fences.
These simulations produce data that actually matters on game night. Average and minimum foot-candle levels, uniformity ratios, and glare metrics all get mapped out before a single fixture goes up. For example, a design might show an average of 50 foot-candles in the infield with a minimum of 30, creating a smooth and playable spread.
Catching Problems Before They Cost Money
One of the biggest advantages of a professional design is spotting problems early. Dark corners in deep outfield areas, excessive brightness behind home plate, or light spilling into nearby streets all show up in the model. Fixing these issues on a screen is far cheaper than fixing them after installation.
Designs also help confirm whether existing poles can be reused or if adjustments are needed. A well-thought-out design acts like a rehearsal, reducing surprises once crews are on-site.
Simulating Real-World Conditions
Good designs go beyond numbers. Simulations can model player sightlines, glare on the batter’s box, and light falloff at the outfield fence, giving a realistic preview of what players will actually experience. This ensures the lighting feels right in practice, not just on paper.
Why Skipping Design Often Backfires
Skipping the design phase is tempting when budgets feel tight. But relying on rough aiming in the field almost always leads to extra labor, frustrated players, and uneven results. Installers may spend days re-aiming fixtures, and even then, the lighting may never quite feel right.
A solid lighting design shortens installation time, simplifies aiming, and helps everyone involved know what success looks like before the first switch is flipped.
Step 7 – Budgeting and Cost Analysis
How Much Will the Upgrade Really Cost Over Time?
When people talk about upgrading baseball field lighting, the first number that usually comes up is the upfront price. That number matters, but it’s only part of the story. A more realistic budget looks at installation costs, long-term energy use, maintenance needs, and system lifespan all together. When those pieces are added up, the picture often looks very different from the initial quote.
LED sports lighting systems are typically rated between 50,000 and 100,000 hours. If a field runs lights about 1,000 hours per year, that translates to 50 to 100 years of usable life on paper. Even accounting for gradual light depreciation, many systems will still perform well beyond 20 years with minimal intervention.
Energy Costs Add Up Faster Than Expected
Energy savings are where the numbers start to feel real. Take a field running 12 metal halide fixtures at 1,500 watts each—roughly 18 kilowatts per hour. Swapping those fixtures for 600-watt LED sports lights drops usage to about 7.2 kilowatts per hour.
Over a season of 1,200 hours at $0.15 per kilowatt-hour, that comes out to nearly $2,000 in annual savings. Over 10 years, that’s close to $20,000, and that’s before factoring in rising energy rates. Fields hosting tournaments or night practices year-round see even bigger savings.
Maintenance, Rebates, and the Bigger Picture
Maintenance costs are often overlooked. Traditional systems require lamp replacements, ballast repairs, and lift rentals just to stay functional. LEDs dramatically reduce these expenses. Fewer service calls and fewer parts replacements mean lower ongoing costs and less downtime.
Utility rebates and energy incentives can also shift the math. Some programs offer incentives based on watts reduced or total energy saved, offsetting part of the initial investment. Looking at total lifecycle costs makes LED upgrades feel much more reasonable than the sticker price alone.
Step 8 – Installation and Project Scheduling
When and How Should the Work Be Done?
Installation timing can make or break a project. Baseball seasons, school calendars, and local weather all affect scheduling. Most owners aim for off-season windows to avoid disrupting games and practices. Spring and fall are typical, though winter installations are possible in milder climates.
A well-timed project feels almost invisible to users, while a poorly timed one creates frustration.
What Installation Really Involves
Installing new lighting isn’t just bolting fixtures onto poles. Crews may need to upgrade electrical panels, replace old wiring, add surge protection, or reinforce foundations for taller or heavier fixtures. Modern systems may also include advanced wireless controls for dimming, scheduling, and monitoring from phones or computers. These features require careful setup and coordination.
Coordinating Contractors and Field Managers
Clear communication between contractors, designers, and field managers makes a huge difference. Knowing when poles will be accessed, when power will be shut off, and when testing occurs avoids last-minute surprises. A realistic schedule keeps stress low and expectations aligned, which is especially helpful for school districts or municipal fields managing multiple sites.
Considering Weather and Safety
Weather can throw a wrench in installation timelines. Strong winds, rain, or even frozen ground can delay pole foundations and fixture mounting. Safety protocols for working at heights and around energized circuits also need planning. Building a buffer into the schedule avoids rushed decisions or unsafe shortcuts.
Step 9 – Testing, Aiming, and Adjustments
Ensuring the Lights Perform as Planned
Once the fixtures are installed, the work is far from finished. Proper aiming is what transforms good equipment into a high-performing lighting system. Installers rely on aiming diagrams from the lighting design to adjust each fixture’s angle, tilt, and orientation with precision.
Even small changes in aiming can have a noticeable impact. A few degrees off can create glare in the batter’s box, leave the pitcher’s mound slightly dimmer than intended, or make outfield corners harder to track. Careful aiming brings the design to life rather than leaving it stuck on paper.
Verifying Performance Across the Field
After aiming, light levels should be measured again in key zones—infield, baselines, mound, outfield alleys, and spectator areas. These post-install readings confirm whether design targets for brightness, uniformity, and glare were achieved. Comparing these results to pre-install measurements ensures that improvements are real and noticeable.
Fine-tuning is normal at this stage. Small adjustments, especially around high-activity areas like home plate or the pitcher’s mound, can make a huge difference in playability. Rushing this step is a common mistake and often leads to player complaints and uneven field experiences.
Adjusting for Real-World Conditions
Simulations can only go so far. Testing should also consider game-time conditions, including night sky glow, shadows from surrounding trees or bleachers, and reflective surfaces. Adjustments made with real-world usage in mind prevent surprises when the first game is played under the lights.
Step 10 – Ongoing Maintenance and Future Upgrades
Keeping the System Reliable Over the Years
Even with LEDs, maintenance doesn’t disappear completely. Periodic inspections help identify loose hardware, electrical wear, or weather-related damage before it becomes a problem. In dusty or coastal environments, cleaning lenses every few years can maintain light output and reduce glare caused by dirt or salt buildup.
Using Modern Monitoring Tools
Many modern systems come with remote monitoring features. These tools report fixture status, power usage, and faults automatically. This makes it easy to catch underperforming fixtures or electrical issues early, rather than discovering a problem mid-game. Monitoring also allows for proactive maintenance, which saves time and reduces costly emergency repairs.
Planning for Future Flexibility
Lighting needs often evolve. A field might start hosting more night games, tournaments, or live-streamed events. Flexible controls allow operators to adjust brightness for practices, games, or special events without installing new fixtures. Leaving space for additional fixtures or upgraded optics ensures the system can grow with the field’s use.
Budgeting for Long-Term Upgrades
Even with durable LEDs, planning for incremental upgrades is wise. Adding smart controls, dimming schedules, or new beam patterns over time keeps the system relevant and efficient. Spending a bit more upfront on flexible infrastructure often saves significant money and hassle down the line.
Ensuring Consistent Playability
Ongoing maintenance and future-proofing aren’t just about saving money—they also protect the quality of play. Consistent lighting reduces visual strain, prevents uneven shadows, and helps players perform at their best regardless of the time of day or season. A well-maintained, adaptable lighting system keeps the field feeling professional for years to come.
| Step | What It Does | How to Achieve |
|---|---|---|
| Step 1 – Check How the Field Lights Are Really Performing | Understand current brightness, uniformity, and fixture condition. | Measure light levels in foot-candles or lux across infield, outfield, mound, baselines, and spectator areas; check for shadows, glare, bent poles, corroded hardware, cracked lenses, and old wiring. |
| Step 2 – Learn the Rules, Codes, and Guidelines | Ensure the lighting system meets industry and local standards. | Review IES and regional recommendations; check zoning, spill light limits (0.3–0.5 fc at property lines), electrical codes, and structural pole requirements; consider local weather and usage patterns. |
| Step 3 – Set Clear Goals for Brightness, Uniformity, and Energy | Define what the upgraded lighting should achieve. | Determine target foot-candles (e.g., 50 fc infield for high school), uniformity ratios, glare limits; factor in game type, night practices, and energy/cost targets; plan for reduced maintenance. |
| Step 4 – Pick the Right Lighting Tech for Baseball | Choose fixtures that provide proper coverage, clarity, and durability. | Select sports-specific LED luminaires with narrow, asymmetric beams; ensure 250–350 ft throw to outfield; pick color temperature (4,000–5,700K) for visibility without harsh glare; avoid non-sports LEDs. |
| Step 5 – Plan Pole Locations and Heights Carefully | Optimize coverage, reduce shadows, and manage glare. | Place poles strategically (4–8 depending on field size); adjust heights (60–80 ft) for even coverage; ensure spacing reduces hot spots; check structural integrity for reused poles. |
| Step 6 – Create a Professional Lighting Plan | Predict field performance and catch issues before installation. | Use lighting software to simulate brightness, uniformity, glare, and spill; model sightlines and outfield coverage; identify problem areas early; confirm pole usability. |
| Step 7 – Figure Out Costs and Long-Term Savings | Understand total investment and lifecycle benefits. | Calculate installation, energy, and maintenance costs; estimate energy savings (e.g., swapping 12×1,500W metal halide with 600W LED can save ~$2,000/year); factor in rebates, incentives, and 20+ year lifespan. |
| Step 8 – Schedule and Manage Installation Smoothly | Ensure upgrade is done efficiently with minimal disruption. | Plan for off-season work; upgrade panels, wiring, and foundations; install wireless controls; coordinate contractors and field managers; account for weather and safety protocols. |
| Step 9 – Test, Aim, and Fine-Tune the Lights | Confirm the system meets design goals and player needs. | Adjust fixture tilt and orientation; re-measure foot-candles across the field; fine-tune high-activity zones; test in real-world conditions including shadows, glare, and reflective surfaces. |
| Step 10 – Maintain the System and Plan for the Future | Keep lighting reliable, flexible, and optimized long-term. | Conduct periodic inspections; clean lenses; use remote monitoring for fixture performance; plan for dimming, additional fixtures, or control upgrades; budget for future improvements to ensure consistent playability. |
Avoiding Common Pitfalls Along the Way
What Mistakes Tend to Cause Regret Later?
One of the most common problems with baseball field lighting upgrades is chasing brightness alone. It’s easy to get caught up in high foot-candle numbers and assume more light automatically means better play. In reality, too much light in the wrong places can be just as frustrating as not enough. Excessive glare near home plate or along the baselines can throw off hitters and infielders, even if the field technically meets brightness targets.
Another frequent issue is selecting fixtures based mainly on price. Lower-cost options sometimes look appealing upfront, but many are not built with baseball-specific optics. These fixtures may struggle to push light 250 to 300 feet into the outfield or control spill light beyond the fence. The result is uneven coverage, higher wattage to compensate, and disappointed users who expected a cleaner look.
Overlooking Structural and Site Conditions
Reusing existing poles can make sense, but only when their condition is verified. Older poles may have hidden corrosion, outdated anchor bolts, or foundations that no longer meet current standards. Skipping a structural check can lead to costly fixes later, especially if issues surface after new fixtures are already installed. Saving money upfront sometimes creates bigger expenses down the line.
Site conditions also get overlooked. Trees that have grown taller over the years, new buildings nearby, or changes in field layout can all affect how light travels. Ignoring these factors often leads to shadowed areas or unexpected glare complaints from neighbors.
Skipping Design and Rushing Decisions
Trying to save money by skipping professional lighting design is another common trap. Without a proper layout and simulation, installers rely on best guesses when aiming fixtures. This usually means extra labor, repeated adjustments, and lighting that never quite feels right. Even small aiming errors can throw off uniformity across the field.
Rushed decisions tend to stack up early in the process. Choosing fixtures quickly, reusing poles without verification, or skipping design reviews may feel efficient at first, but those shortcuts often resurface as ongoing issues. Most long-term frustration can be traced back to decisions made before installation ever began, not to the equipment itself.
A Few Closing Thoughts on Lighting Up the Game
Upgrading baseball field lighting is part technical project, part long-term investment. When done thoughtfully, it changes how the game feels after sunset. Players react faster, umpires see plays more clearly, and fans stay engaged from the first pitch to the last out.
The best upgrades rarely feel flashy. They just work, night after night, season after season. With the right planning, realistic goals, and attention to detail, a field can shine in all the right ways without draining the budget or patience of everyone involved.