The International Cricket Council (ICC) is committed to ensuring that players around the world enjoy the best possible playing surfaces, whether natural grass or artificial turf. There are notable differences between sod lawns and synthetic outfields, and understanding these differences is crucial when deciding what’s best for your stadium or indoor sports facility.
This guide will start by exploring the most common grass seeds used in cricket fields, followed by a discussion on plant crown height. We will then address the key question: is a natural grass oval superior to an artificial playing surface?
As we delve into maintenance aspects, you may uncover additional reasons to choose one option over the other. You will also find information on the cost of grass seeds and related expenses. Lastly, I will offer some valuable tips to assist you with your project.
Table of Contents
ToggleTypes of Grass for Cricket Fields and Stadiums
Choosing the right grass for a cricket field or stadium depends on various factors, including climate and maintenance requirements. Here is an overview of popular grass species used for cricket grounds:
Grass Seed Options for Cricket Pitches
For cricket pitches, Bermuda grass and Perennial ryegrass are the most commonly used types. Each has distinct characteristics and benefits:
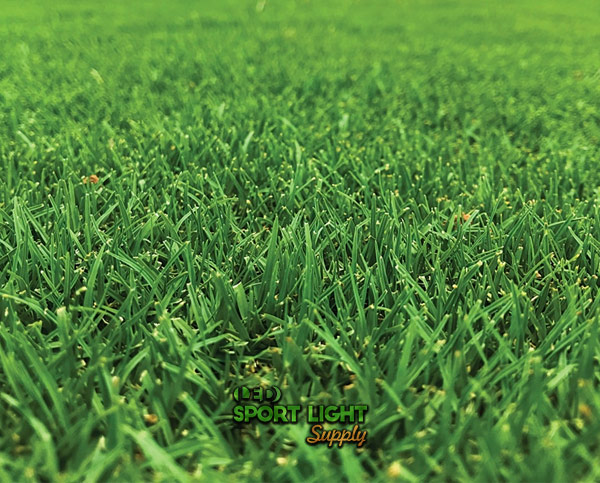
Bermuda grass (Cynodon dactylon) is known for its aggressive growth and resilience. It spreads through both underground rhizomes and above-ground stolons. The rhizomes form an extensive root network, while the stolons extend outward and establish new roots. This growth pattern makes Bermuda grass particularly effective at healing quickly from wear and tear. It thrives with regular watering and fertilization and can handle heavy traffic.
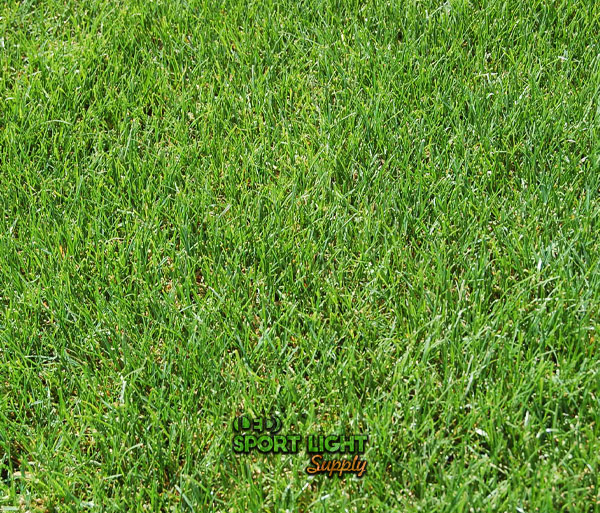
Perennial ryegrass (Lolium perenne) is often found in meadows and is available in improved agricultural varieties. It develops into a tall plant with shiny, visually appealing leaf undersides that create a pleasant effect in the wind. Regular mowing is necessary to maintain its ideal height. Perennial ryegrass is known for its vigorous growth and attractive appearance.
Grass Seed Options for Cricket Outfields
For the outfield, a blend of various grass species is usually preferred to ensure durability and visual appeal. The most common species include:
| Grass Type | Scientific Name | Description | Maintenance | Best Use |
|---|---|---|---|---|
| Bermuda Grass | Cynodon dactylon | Spreads through rhizomes and stolons, creating a dense mat. Known for its aggressive growth and rapid recovery. | Requires frequent mowing and regular watering. Handles heavy traffic well. | Ideal for pitches due to its durability and self-healing properties. |
| Perennial Ryegrass | Lolium perenne | Found in meadows and improved varieties for agriculture. Features shiny leaf undersides that create a visual effect. | Needs regular mowing to maintain height. Grows well in cooler climates. | Suitable for pitches and areas needing a high-quality, visually appealing surface. |
| Tall Fescue | Festuca arundinacea | Known for its tolerance to wear and robust root system. Has a broad, resilient leaf structure. | Low to moderate maintenance. Adapts to a variety of soil types. | Best for outfields due to its durability and adaptability to different conditions. |
| Meadow Grasses | Various species | Includes any airborne species that land in the field. Generally hardy and easy to manage. | Requires regular mowing to keep in check. | Suitable for general outfield areas where regular maintenance is feasible. |
| Common Bent | Agrostis tenuis | Features a soft, silky texture. Prefers drier, hotter conditions and has a less tufted growth compared to Creeping Bent. | Moderate maintenance. Best suited for Transition Zones with appropriate watering. | Ideal for drier, hotter areas of the field. |
| Red Fescue | Festuca rubra | Creeping growth habit with needle-like leaves. Forms a dense cover. | Requires moderate maintenance. Thrives in cooler climates and well-drained soils. | Suitable for areas with bare spots or where a dense, creeping grass is needed. |
| Sheep’s Fescue | Festuca ovina | Forms tufted clusters with needle-like leaves. | Requires low maintenance. Adapts well to various soil types. | Best for areas needing a tufted appearance and in soils with varying quality. |
Cricket Stadium Grass Height
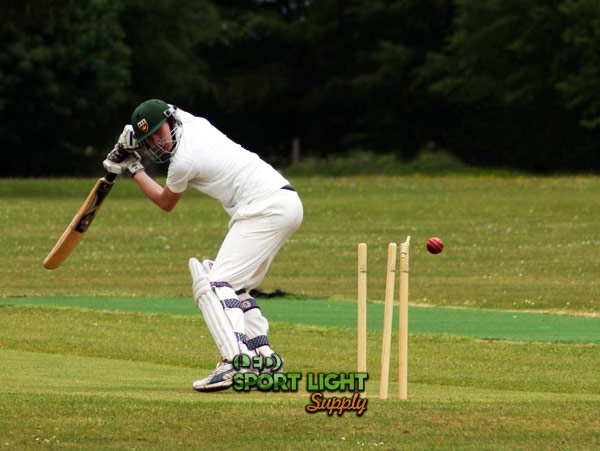
The optimal grass height for a cricket stadium can vary depending on the geographic location and specific needs of the field. The field’s location in one of the three climatic zones—North, South, or Transition Zone—will influence the ideal grass height.
Grass Height Variations
Grass naturally grows to a taller height if left untrimmed. However, for cricket, maintaining specific heights is crucial for the functionality of the game. The height of the grass affects both the playability and the maintenance requirements of the field.
Cool-Season Lawns
For cool-season grasses, the ideal height typically ranges from 2.5 inches to 5 inches. This range balances the grass’s health with the playing conditions.
Warm-Season Lawns
In warmer climates, grass can be maintained at a significantly shorter height. With proper tools and fertilizers, it is possible to keep the grass as short as 0.5 inches. This ultra-low height is often used in warm-season areas where high maintenance is feasible.
Importance of Maintaining Grass Height
Maintaining the correct grass height is essential for several reasons:
Functional Performance
Maintaining shorter grass on a cricket pitch offers significant advantages for both batters and bowlers. A lower playing surface facilitates a more predictable ball bounce, allowing batters to strike the ball more effectively. The consistency of the bounce is crucial for players, as it enables them to anticipate the ball’s behavior, enhancing their ability to play accurate shots. For bowlers, shorter grass supports a more stable grip and controlled delivery, as the reduced friction from the shorter turf minimizes unwanted variations in the ball’s trajectory. Overall, a well-maintained, short grass pitch enhances the quality of play by ensuring that both batting and bowling performances are optimized.
Maintenance Efficiency
Grass that grows taller than 2 inches can become increasingly difficult to manage. Taller grass tends to bend and break, which can make mowing and general upkeep more challenging, particularly on a field that is used frequently. Overgrown grass may also lead to uneven growth and a less consistent playing surface, which can impact the performance of the pitch. Regular mowing is essential to keep the grass at an optimal height, which helps maintain the field’s usability and reduces the likelihood of maintenance issues. By keeping the grass short, groundskeepers can more easily manage the field and ensure that it remains in good condition throughout its use.
Aesthetics and Usability
The aesthetic appeal and usability of a cricket field are closely tied to the height of the grass. Taller grass can easily become marked by play, leading to an uneven and worn appearance that detracts from the field’s visual appeal. This can be particularly problematic in high-profile games or events where the condition of the pitch is under scrutiny. Keeping the grass at a shorter height helps maintain a smooth and consistent surface, which not only enhances the field’s appearance but also contributes to a more predictable and enjoyable playing experience. A well-maintained, short grass field reflects a high standard of care and can positively influence players’ performance and overall satisfaction.
Natural Grass vs. Synthetic Turf

The decision between natural grass and synthetic turf is influenced by factors such as budget, maintenance, and the intended use of the field. Each option has distinct advantages and disadvantages.
Natural Grass
| Advantages | Disadvantages |
|---|---|
| Offers a softer playing surface | Difficult to maintain during winter months |
| Grows quickly in spring and summer, providing a lush appearance | Higher maintenance costs due to faster growth and seasonal changes |
| Provides a natural feel and aesthetic | Susceptible to fungal diseases, pests, and other environmental issues |
Synthetic Turf
| Advantages | Disadvantages |
|---|---|
| Requires less maintenance compared to natural grass | Requires an optimal drainage system to prevent water accumulation |
| Easy to clean and maintain | Can become a breeding ground for germs and pathogens if not properly sanitized |
| Usable in all weather conditions and seasons | May deteriorate with excessive play over time |
Cricket Field: Sod Rolls or Seeding?
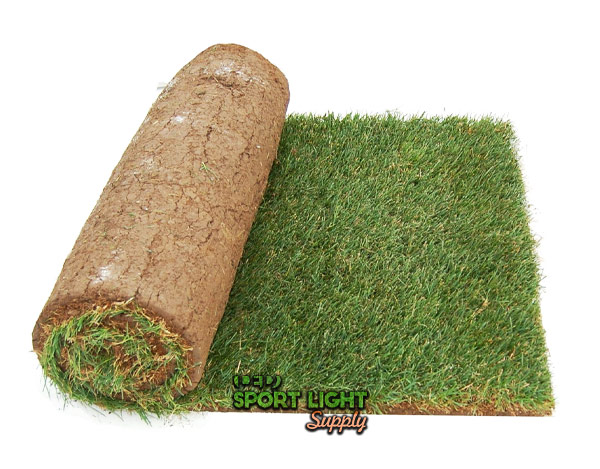
Perennial Ryegrass Sod
Sod rolls offer a quick solution to patch bare spots on a cricket field. They involve purchasing rolls of grass and soil, which are then installed on the field. However, using sod rolls requires careful handling to avoid common mistakes.
To maximize the effectiveness of sod rolls, it is crucial to understand a few basic principles. Firstly, sod rolls should not be left under direct sunlight for more than 24 hours before installation. If possible, store them in a shaded, cool area for no longer than two days. Ideally, sod rolls should be laid down on the day of purchase, regardless of weather conditions.
High-quality sod rolls are harvested daily from the original fields, usually early in the morning before sunrise. Ensure that the grass blades remain green and healthy upon delivery.
Before installing sod rolls, it is essential to loosen the subsoil of the destination field. A compacted base can hinder the growth of sod, making it necessary to water frequently. Loosening the existing base material will facilitate root establishment and recovery from transplant stress.
Avoid adding excessive layers of black dirt underneath the sod rolls, as this can lead to root rot. Instead, incorporate free-draining material within the top 4 inches of soil. An optimal mixture includes two-thirds organic material and one-third sand to promote drainage and prevent water accumulation beneath the sod.
Best Practices for Seeding
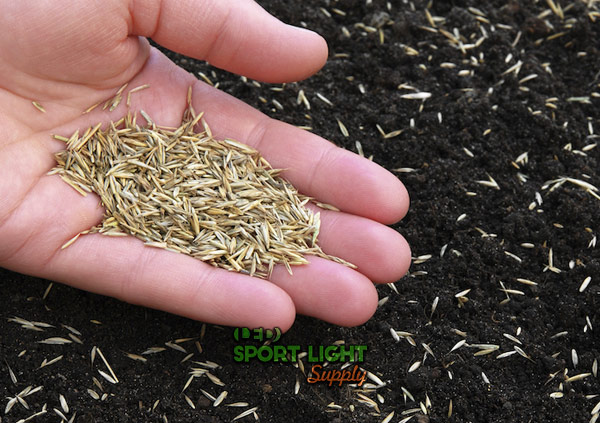
Seeding is a viable option if you can afford the time for germination. Fast-growing species like ryegrass can quickly cover bare spots, though expect a minimum of 45 days for germination. Weather conditions can also affect the process.
The key to successful seeding or overseeding is maintaining moisture. Fertilizer is not necessary at this stage; focus on keeping the seeds moist and in contact with the soil. Adjusting the sprinkler schedule can help achieve this.
In some cases, using a rake to ensure seeds make contact with the soil in patchy areas can be beneficial. Depending on weather conditions, watering the seeded areas 3 to 4 times daily may be required. Protect the seeds from birds, which may feed on them or the earthworms attracted by the moisture.
Ryegrass typically germinates within 7 to 21 days, but germination periods vary among grass types. Monitoring weather forecasts before seeding can help minimize the risk of overwatering. Once the grass is established, it will generally require minimal maintenance. Soil tests can identify nutrient deficiencies, allowing for targeted fertilization.
Maintenance of Outdoor vs. Indoor Cricket Ground Turf
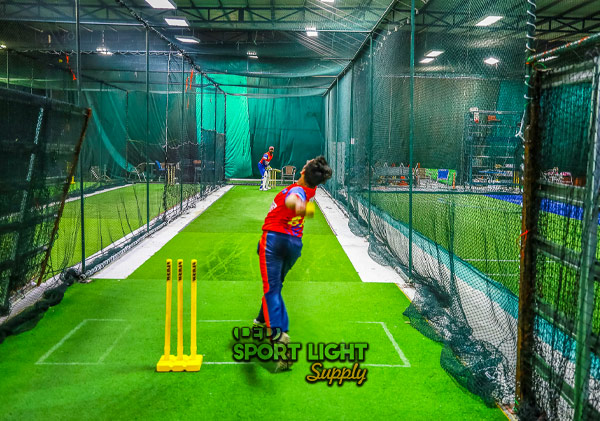
Maintaining real grass on an indoor cricket ground presents challenges, primarily due to limited sunlight. The costs associated with artificial lighting for grass growth can be substantial. Furthermore, even with a transparent dome, issues with air exchange and temperature may arise, necessitating the expertise of an agronomist.
Both real grass and synthetic turf require proper drainage and irrigation systems. While synthetic turf needs only weekly cleaning, managing water drainage remains crucial.
Synthetic turf is often the preferred choice for indoor sports facilities due to its durability and resilience. Cricket, being a high-impact sport, demands a surface that can withstand speeds of up to 90 mph from a hard leather ball. For synthetic turf, selecting a safe infill material that meets ICC safety standards is essential.
For outdoor cricket fields, investing in professional maintenance equipment, such as a lawn mower, is advisable. Even if synthetic turf is installed, a snow removal machine for winter maintenance could be beneficial.
Cost of Cricket Stadium Grass
Maintaining a cricket field involves significant costs, whether you choose natural grass or synthetic turf. Here’s a breakdown of the costs and considerations for each option.
Costs for Natural Grass
Hiring a lawn care company to manage a cricket field can cost up to $10,000 annually. This price typically covers weed removal, fertilization, and overseeding to keep the grass healthy. However, it does not include the cost of sod seeds, which can exceed $5,000.
To manage costs, you might select an affordable grass blend for the outfield. Despite this, ongoing maintenance will be necessary. Investing in your own equipment could help manage costs, allowing you to handle various tasks yourself.
Costs for Synthetic Turf
Synthetic grass prices range from $8 to $15 per square foot. Higher-quality products generally come with a higher price but offer greater durability and better performance. Low-quality turf can lead to issues such as ruptured seams or melting from reflective heat. Repairing such problems can be expensive, so choosing high-quality turf with a robust warranty is advisable.
Dimensional instability can occur with poorly installed or low-quality synthetic turf. Ensure that the installation is performed by experienced professionals familiar with the product.
Synthetic turf can absorb a lot of heat, leading to additional cooling expenses before matches during hot weather. Since cricket games can last several hours, this can add up over time.
Where to Buy Cricket Stadium Sod Rolls and Synthetic Turf
Sod Rolls
It is best to purchase sod rolls from local dealers. Sod is cut from fields and transported quickly to dispatch centers, so timely installation is crucial. Buy sod rolls only from reputable sources and install them in sunny weather conditions. Avoid purchasing sod rolls during extended rainy periods.
Local sod rolls allow you to inspect the quality before purchase and ensure compatibility with local conditions. If buying from larger companies that ship from out of town, thoroughly research to confirm that the grass type suits your environment.
Synthetic Turf
Synthetic turf can be purchased from various suppliers. Requesting samples from manufacturers is essential before placing an order. Testing multiple samples can take several months, especially if you need to evaluate UV discoloration. Note that the color of synthetic turf can change over time due to UV exposure, which may affect repairs or aesthetic consistency.
DIY Installation of Sod Rolls
Installing sod rolls yourself can be a cost-effective option for repairing sections of a cricket ground. The process involves several steps:
| Step | Description | Details and Tips |
|---|---|---|
| Prepare the Area | Remove the existing lawn and any debris from the area you intend to repair. | Use a shovel or garden fork to lift and remove old grass and weeds. Clear away any stones, roots, or other debris. Ensure the area is level and smooth for the best results. |
| Add and Compact Fill Dirt | Apply a mixture of fill dirt and sand, then compact it to reduce settling. | Prepare a mixture of 2/3 fill dirt and 1/3 sand to enhance drainage. Spread the mixture evenly over the prepared area. Use a garden roller or hand tamper to compact the soil and minimize future settling. Alternatively, a rototiller can be used to mix the soil thoroughly before compacting. |
| Watering Schedule | Establish a regular watering schedule to help the sod rolls establish roots. | Begin watering immediately after installation. Maintain a consistent watering schedule to keep the soil and sod moist. Adjust the frequency based on weather conditions—more frequent watering may be needed in hot or dry periods. |
| Lay the Sod | Start by laying the sod along the longest edge or boundary first, then stagger each row in a brick-like pattern. | Lay the first row of sod along a straight edge to ensure alignment. Continue by placing subsequent rows in a staggered pattern to avoid seams and ensure a more natural appearance. Press the sod pieces together to eliminate gaps. |
| Edge Alignment | Ensure that the edges of each sod piece are tightly butted against adjacent pieces. | Place sod pieces edge to edge, making sure there are no gaps between them. Use a sharp knife to trim any excess sod around the edges for a neat fit. Ensure that the edges align properly to promote even growth. |
| Light Watering | Water lightly after installing every 200 square feet of sod. | After installing each section of sod (approximately 200 square feet), water lightly to encourage root establishment. Avoid overwatering, as this can lead to waterlogging and other issues. Adjust watering based on soil moisture levels. |
| Roll the Area | Use a roller to ensure solid contact between the sod and the underlying soil. | After the entire area is covered with sod, use a lawn roller to press the sod firmly into the soil. This ensures good contact and helps to prevent air pockets. Roll the area in multiple directions for even pressure. |
Conclusion
Choosing between natural grass and synthetic turf for a cricket field involves weighing maintenance, cost, and performance. Natural grass offers a classic playing surface but requires intensive upkeep and is sensitive to weather. Synthetic turf provides durability and low maintenance but comes with higher initial costs and potential heat management issues.
This guide has covered the essentials of grass seed selection, maintaining optimal grass height, and the benefits and drawbacks of each surface type. By considering these factors, you can make a well-informed decision that best meets the needs of your cricket facility.
