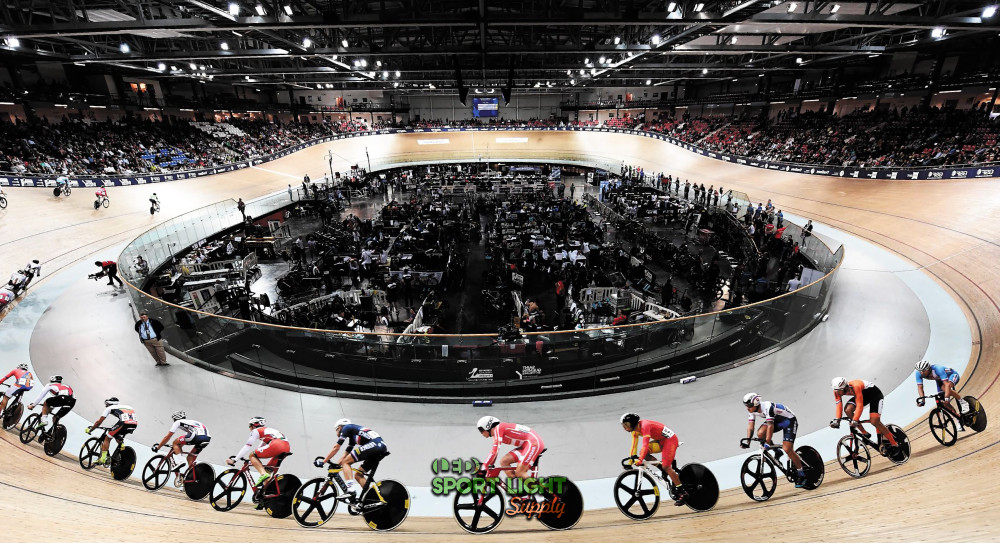
Walk into a velodrome during a race, and the first thing you’ll notice—after the sound of wheels humming on wood—is the glow. The entire arena feels alive under a clean, even layer of light. Good lighting design isn’t just about visibility; it’s about how the space feels, how athletes perform, and how spectators engage. For cyclists pushing 60 km/h on steep banked turns, lighting can mean the difference between confidence and hesitation. For the audience and cameras, it defines how dynamic and sharp the event looks.
So, how should velodrome lighting be designed? And what kind of numbers are we talking about in terms of brightness, color, layout, and energy? Let’s break it down piece by piece, from why it matters to how professionals usually plan it.
Why Is Lighting Design Important for Velodrome?
Lighting design for a velodrome isn’t just about turning on bright lights. A good design creates an atmosphere where speed, safety, and spectacle all come together.
Cyclists need consistent and comfortable light to read the track, time their moves, and react quickly. Uneven illumination can make it hard to judge the banking angle or the distance between riders, especially at high speeds. When the track is uniformly lit, riders don’t have to adjust their eyes every few seconds. This helps reduce fatigue and lets them focus purely on performance.
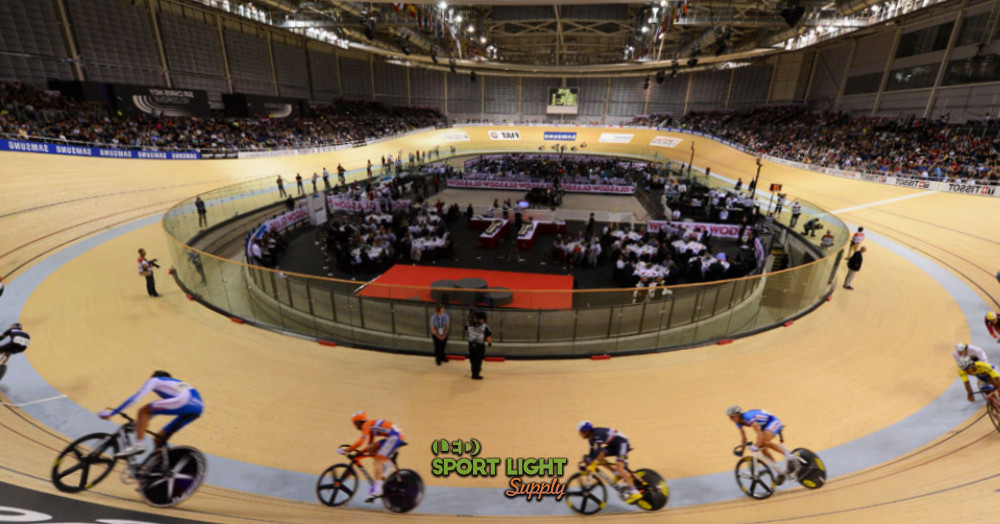
For spectators, the right lighting makes the action more immersive. You can follow every move clearly, even when riders enter the curved sections or when the peloton packs tightly. It also brings out the natural tones of the wood track and the vibrant colors of the jerseys, keeping the energy high throughout the event.
Broadcasting adds another layer. High-definition and slow-motion cameras demand specific vertical illuminance levels—often around 1,200 to 1,500 lux—to capture detailed images without flicker or shadow. This means designers need to balance horizontal and vertical light carefully, ensuring cameras see what the eye sees.
And of course, lighting design plays a big part in energy use and maintenance. Modern velodromes often use LED systems that can dim, switch modes, or adapt to different events. That helps control costs while keeping performance consistent. A well-thought-out design can cut energy consumption by as much as 40–60% compared to older metal halide setups.
Lighting Design Guide
A velodrome’s lighting design isn’t something you can improvise—it’s a balance between technical precision and visual comfort. The goal is simple: make the track look clear, bright, and consistent from every angle while keeping energy use under control. There are a few major parameters that define how well lighting works in a real-world setting, including brightness (lux or foot-candle levels), uniformity, color temperature, glare control, and a handful of other factors such as color rendering, flicker, and maintenance performance. Each one influences how the space feels, how safe it is for riders, and how good it looks for spectators and cameras.
| Parameter | Recommended Range / Value | Details |
|---|---|---|
| Brightness (Lux / Foot-Candle) | 300–500 lux (28–46 fc) – Recreational / Training800–1,200 lux (75–110 fc) – Regional / National1,500–4,000 lux (140–370 fc) – International / Broadcast | Higher levels for cameras & finish lines |
| Uniformity (Emin/Eavg) | ≥ 0.6 (Small events)≥ 0.7–0.8 (Professional / World-class) | Even light distribution, no dark zones |
| Color Temperature | 4,000 K – 5,700 K | 5,000 K ideal for wooden indoor tracks |
| Glare Control (UGR) | ≤ 22 | Reduce reflections and visual discomfort |
| Color Rendering (CRI) | ≥ 80 (Training)≥ 90 (Competition / Broadcast) | Better color accuracy and visual clarity |
| Flicker Rate | < 1% | For high-speed camera compatibility |
Brightness (Lux / Foot-Candle Levels)
When people talk about velodrome lighting, they usually start with brightness—measured in lux (lumens per square meter) or foot-candles (lumens per square foot). One foot-candle equals about 10.76 lux, which means that when you’re designing lighting levels, you can easily convert between the two depending on regional standards.
For recreational or training velodromes, lighting levels of around 300–500 lux (about 28–46 foot-candles) are usually enough. That’s bright enough for riders to see clearly, but not so intense that it becomes uncomfortable or wasteful. You’ll often see community or club tracks stick closer to 300 lux to keep energy costs down, especially if they operate mostly in the evenings.
When you step up to regional or national-level events, you’ll want stronger illumination—somewhere between 800 and 1,200 lux (75–110 fc). This helps riders maintain visual clarity when sprinting at high speeds (40–70 km/h) and allows judges and officials to read timing instruments or signals without strain.
For international or broadcast-level competitions, the numbers climb quickly. Tracks designed for major tournaments or televised races often hit 1,500 to 4,000 lux (140–370 fc). The extra brightness helps cameras capture sharp, flicker-free images, especially in slow-motion replays or close-up shots at the finish line. It also enhances vertical illuminance, which is key for proper visibility on riders’ faces and jerseys when they’re filmed.
It’s not just about making everything brighter, though. More light doesn’t automatically mean better visibility. Without proper light distribution and uniformity, riders could end up passing through alternating bright and dim areas, which can be disorienting and even unsafe at race speeds.
Uniformity
Uniformity is one of those behind-the-scenes details that makes or breaks a lighting setup. It measures how evenly light is spread across the track surface. A uniformity ratio (Emin/Eavg) of at least 0.6 is common for smaller events, but top-tier facilities usually aim for 0.7 or higher, sometimes even 0.8 for world-class competition tracks.
That means the darkest point on the track shouldn’t be less than 70–80% of the average brightness. Why does that matter? Imagine riding into a dim corner at 60 km/h after coming off a brightly lit straight—it throws off your visual rhythm and perception of depth. Good uniformity helps maintain a stable sense of motion and lets cyclists judge curves, banking, and distance with confidence.
Designers use different beam angles, luminaire positions, and mounting heights to balance out these variations. The trick is to overlap the beams slightly so that one fixture’s light fills the gaps of another’s. Advanced lighting simulations—often done in programs like DIALux or AGi32—help calculate this before installation. Real-world measurements with lux meters across multiple grid points then confirm if the design works as intended.
Uniformity isn’t just for the riders. It also affects camera exposure, color consistency, and spectator comfort. Uneven light can create overexposed spots on broadcast feeds or make part of the track look flat and dull. A well-balanced system ensures every inch of the track feels visually smooth, even under high-speed photography.
Color Temperature
If brightness decides how much light there is, color temperature decides how that light feels. Most modern velodromes use lighting between 4000K and 5700K, producing a bright, slightly cool white tone.
A 4000K setup gives off a more neutral white that feels natural and inviting—good for smaller indoor tracks or community venues. On the other hand, 5000K to 5700K creates a crisper, daylight-like look that’s perfect for professional competitions and broadcasts. It enhances visibility, sharpens shadows, and keeps riders more alert.
Interestingly, the type of track surface matters too. Wooden tracks—like those made from Siberian pine or Afzelia—reflect light differently than concrete or composite ones. A 5000K tone brings out the warm color of the wood while keeping the overall atmosphere bright and energetic. If the color temperature goes too high (over 6000K), the light can start to feel cold or overly harsh for spectators sitting close to the track.
The key is to find that sweet spot where clarity, comfort, and color perception all work together. It’s why top venues often combine fine-tuned color temperature with high color rendering values for the most natural visuals possible.
Glare Control
Glare is one of those things you don’t think about—until it’s a problem. In a velodrome, cyclists lean at steep angles, sometimes up to 45° on the banks, and a mis-aimed light can shine straight into their eyes or bounce off the glossy wooden surface. That split second of visual discomfort can affect focus and reaction time.
To manage glare, designers usually keep fixture tilt angles at 65° or less from vertical, using asymmetric optics or anti-glare visors to direct light precisely where it’s needed. The idea is to light the track surface evenly without spilling into riders’ line of sight or the camera lens.
Broadcast-level events have even stricter requirements. Cameras positioned at multiple angles around the arena must capture clean, balanced images without bright reflections or glare streaks. Some projects go as far as simulating camera exposure patterns during the design stage to minimize glare in live footage.
Proper glare index control (usually measured by Unified Glare Rating, or UGR) keeps the experience comfortable for both athletes and audiences. Ideally, the UGR should stay below 22 for sports venues of this type. Anything higher, and the lighting starts to feel harsh or uncomfortable over long viewing periods.
Color Rendering (CRI)
The Color Rendering Index (CRI) tells you how true colors appear under artificial light compared to natural daylight. A perfect score is 100, and most high-end velodrome lighting systems aim for CRI values above 90.
A CRI of 80 might be acceptable for general training, but in competitions—especially those broadcast in HD or 4K—anything lower than 90 can cause colors to look flat or distorted. With CRI 90+, you get rich, accurate tones on jerseys, advertising boards, and the track surface itself. That’s not just for aesthetics—it also helps athletes and officials identify colors and markings more clearly.
Modern LED floodlights make it easier to achieve this consistency. Older metal halide lamps often drifted in color over time, meaning one section of the track could look slightly yellowish compared to another. LEDs, on the other hand, maintain stable color rendering over tens of thousands of hours, keeping the look uniform across the entire space.
Flicker and Dimming
Flicker might sound like a minor annoyance, but in a televised velodrome, it’s a deal-breaker. Cameras shooting at high frame rates—especially 120 fps or above—can pick up invisible flicker from low-quality light drivers, leading to distracting banding in replays.
Modern LED systems solve this with high-frequency or flicker-free drivers that reduce flicker to less than 1%. That ensures clear, stable footage even during ultra-slow-motion broadcasts.
Dimming control is another big plus. With multi-level dimming systems, operators can switch between different modes—say, 30% output for training sessions (around 300 lux) and 100% for competition (up to 2,000 lux)—without changing light quality or color tone. This flexibility doesn’t just save energy; it extends fixture lifespan and reduces overall operational costs.
Advanced systems even tie into smart lighting controls or DMX-based setups, allowing precise brightness zoning. For example, the infield, spectator stands, and track can each have their own lighting presets. It’s efficient, customizable, and keeps the environment feeling balanced no matter what event is happening.
Maintenance Efficiency
Lastly, no lighting system stays perfect forever. Dust, humidity, and normal wear can all reduce light output over time. That’s why maintenance efficiency is an underrated but vital part of design.
High-quality LED luminaires typically last 50,000–100,000 hours, but to maintain consistent brightness, venues often schedule photometric testing every 12–18 months. Regular cleaning of lenses can restore up to 10–15% of lost illuminance. Also, designing with easy maintenance access—like catwalks or service lifts—saves a lot of trouble (and money) down the line.
Lighting Layout Principle

Lighting layout is where art meets engineering—a place where technical precision shapes how people actually experience a space. Getting the layout right determines not only how bright the velodrome looks but also how evenly that brightness spreads, how efficient it is, and how easy it’ll be to maintain over the years.
Every decision—from the number of lights to their height, spacing, and wattage—affects visibility, safety, and atmosphere. The trick is to design a system that feels seamless, with no dark spots, glare, or flicker, no matter how fast the riders go or how sharp the banked turns are.
| Parameter | Value / Range |
|---|---|
| Number of Fixtures | 60–150 (standard 250 m track) / 200+ (international) |
| Luminous Output per Fixture | 40,000–80,000 lumens |
| Mounting Height | 10–20 m (typ. 15 m) |
| Fixture Tilt Angle | ~40° beam for 15 m height |
| Fixture Spacing | 1.2–1.5 × mounting height (≈ 18–22 m for 15 m height) |
| Beam Angles | 25°–40° (banked turns) / 50°–70° (straights) |
| Wattage per Fixture | 300–600 W (training) / 800–1,000 W (competition) |
How Many Lights Do We Need?
The first thing most designers ask is, “Okay, so how many lights are we talking about?” The answer depends on several variables—track size, roof height, fixture power, beam spread, and the target lux level.
For a standard 250-meter indoor velodrome, lighting plans usually call for somewhere between 80 and 150 high-output LED floodlights. Smaller community or training tracks might manage with fewer than 60, while international-grade venues can easily use 200 fixtures or more.
Each luminaire typically outputs between 40,000 and 80,000 lumens, depending on the model and optics. The main idea is to overlap light beams slightly so there are no gaps or uneven patches on the track surface. Even if one or two lights fail, the rest should still maintain adequate illumination for safe use.
Some designers also apply the “3× rule” when estimating light quantity: roughly three fixtures per 10 meters of track length (adjusted for brightness goals). This gives a ballpark estimate before running detailed simulations. Of course, the final number always depends on beam efficiency, mounting angle, and event standards.
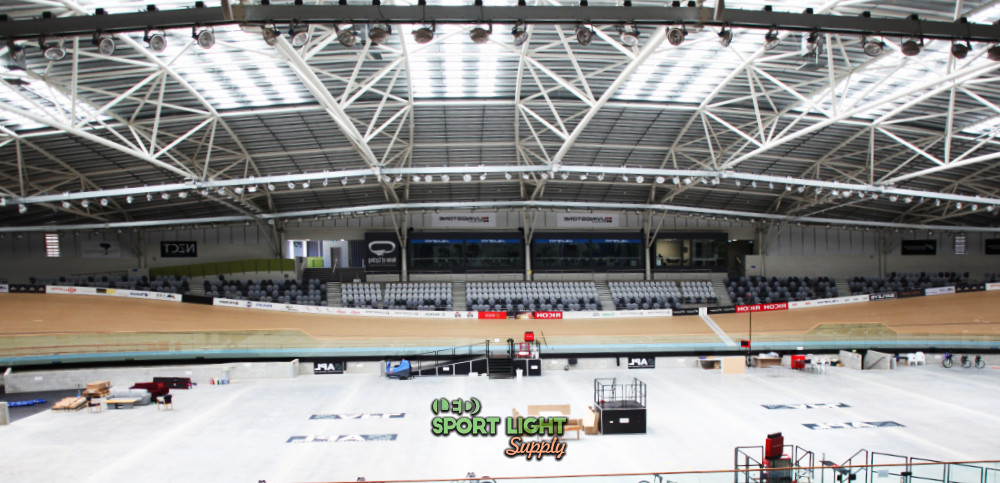
Mounting Height
Mounting height is another big factor that shapes the look and feel of the lighting. Most velodromes install fixtures between 10 and 20 meters above the track, depending on the roof design and the light spread.
Mount them too low, and you’ll get hot spots or glare; too high, and you risk creating dark patches or wasting light on the ceiling instead of the track. For example, a 15-meter mounting height with a 40° beam angle usually gives strong coverage without harsh reflections.
Many modern velodromes go for perimeter-mounted lighting systems, where the lights are arranged around the oval rather than just overhead. This helps spread light more evenly, especially around the banked turns, and keeps fixtures out of athletes’ sightlines. In some high-end setups, you’ll even find dual-ring layouts, with one ring focusing on the inner track and another targeting the outer sections.
Wattage and Energy
The wattage and total power demand depend on how bright you need the venue to be. For smaller training facilities, each fixture might run at 300 to 600 watts, while larger or televised venues often use 800 to 1,000-watt units.
Altogether, a training-level track might draw around 30–50 kW of total power, while an international-level competition venue could need 120–150 kW. That might sound like a lot, but with modern LED sports lighting, it’s still far more efficient than older metal halide systems, which could easily exceed 200 kW for the same brightness.
Besides lowering power bills, LEDs also cut heat output—a big deal for indoor velodromes, where excess heat can mess with air temperature and even affect track materials. Over time, this efficiency can save thousands of dollars annually in operating and cooling costs.
Some venues even go one step further with smart dimming systems that automatically lower brightness during non-competition hours or adjust based on available daylight. A setup like that can reduce total energy use by up to 50% without sacrificing visibility.
Spacing and Beam Angles
Getting the spacing right is one of the hardest parts of lighting layout. On average, fixtures are spaced about 1.2 to 1.5 times the mounting height apart. So, if the lights are 15 meters up, spacing them 18–22 meters apart usually gives good uniformity.
For curved banked sections, where the track rises steeply, designers often switch to narrower beam angles—around 25° to 40°—to concentrate light where riders actually travel. On the straights, wider beams of 50° to 70° give more even coverage.
Every velodrome has its own geometry, so designers usually run detailed 3D lighting simulations before installation. These tests show how the light interacts with the track surface, walls, and seating areas. By fine-tuning angles and overlaps, they can keep the uniformity ratio above 0.7 and eliminate dark spots completely.
A well-balanced beam plan also helps reduce shadowing from structures, cameras, or spectators—something that’s easy to overlook but makes a big difference for both athletes and broadcasts.
Maintenance and Access
If there’s one thing that gets underestimated in lighting design, it’s maintenance access. Velodromes have complex roofs and high mounting points, which means replacing or cleaning fixtures can be a real challenge if the design doesn’t consider it early on.
Good layouts include service walkways, catwalks, or lift access points so technicians can reach fixtures safely. With LED lights lasting 50,000 to 100,000 hours, full replacements aren’t frequent, but annual cleaning and re-aiming checks are still needed to maintain brightness and alignment.
A dirty lens or misaligned beam can cut effective illumination by 10–20%, which, over time, adds up to a noticeable loss in performance. Planning for easy maintenance upfront saves both time and money down the road and keeps the lighting consistent for years.
Control and Zoning
Zoning brings flexibility and efficiency to the lighting layout. By dividing fixtures into zones—like inner track, outer track, infield, and spectator stands—operators can switch on only what’s needed for each type of event.
For example, a weekday training session might use just 40% of the total lighting, providing around 300–400 lux, while a national championship would use full output at 1,500 lux or higher. For televised events, additional circuits might boost specific areas, such as the finish line or camera angles, to 3,000 lux or more.
Modern LED systems can integrate with DMX or DALI control protocols, allowing smooth dimming transitions and pre-set lighting scenes for different activities. This not only saves power but also lets the venue quickly switch from “training mode” to “competition mode” or “broadcast mode” with the press of a button.
Another perk of zoning is maintenance flexibility. If one section needs servicing, operators can switch off just that area without affecting the rest of the arena. It’s a small thing that makes day-to-day operation much easier.
Extra Considerations
A good lighting layout doesn’t stop at just brightness and spacing—it also looks at reflection control, color balance, and spectator comfort. Indoor velodromes with wooden tracks often reflect more light than concrete ones, so designers may adjust the intensity or angle to prevent visual glare.
Some venues also add backlighting or accent lighting for the infield or spectator zones to make the space feel more dynamic without interfering with competition lighting. Others integrate emergency lighting systems that automatically activate at 30% brightness if the main power fails, keeping riders safe and visible until backup systems kick in.
Common Issues When Having Lighting Design
Even with the best software, the right fixtures, and all the planning in the world, real-world lighting design can still surprise you. Velodromes, in particular, are tricky because of their shape, surface materials, and how light interacts with speed and motion. A design might look perfect on paper, but once the lights are on, issues like uneven illumination, glare, or color imbalance can quickly show up. Let’s look at a few of the most common problems that come up—and what can be done about them.
Uneven Brightness and Patchy Illumination
Probably the most frequent complaint after installation is that the light isn’t even across the track. You might have bright “hot spots” on the straights and dimmer patches in the curves or upper banks. This usually happens when beam angles, mounting heights, or aiming directions aren’t perfectly coordinated.
Even a small aiming error—say just 3–5 degrees off—can shift a beam several meters at track level, throwing off the entire balance. That’s why commissioning and calibration on-site are so crucial. You can’t just trust the simulation; you have to measure lux levels at multiple grid points on the actual track, typically every 3–5 meters, to make sure everything lines up.
Some designers also forget that track surfaces reflect differently. A glossy timber surface reflects light in a very directional way, while a matte concrete surface scatters it. If this isn’t factored in, you’ll get uneven brightness even if the aiming angles are technically correct.
Glare and Reflections
Glare is another big issue, especially in older velodromes that upgraded to LEDs but kept their original fixture angles. LEDs are far more directional than traditional lamps, so if they’re aimed incorrectly, you end up with intense specular glare bouncing off the polished wood or even off riders’ helmets and bikes.
Cyclists moving at 60 km/h don’t have time to squint or adjust to sudden brightness changes. That’s why designers try to limit fixture tilt angles to under 65° from vertical, use asymmetric optics, and add glare shields where needed. The aim is to make the light strong and even on the track but invisible to the eye when you’re actually riding.
Another subtle problem is camera glare during televised events. Certain beam directions can reflect straight into broadcast camera lenses, producing bright white flares that ruin footage. This is often solved by adding cross-lighting setups or slightly repositioning fixtures to change the reflection path without affecting brightness.
Poor Color Balance
Mixing lighting types is a recipe for uneven color balance. Some older velodromes still have a mix of metal halide lamps and new LED fixtures, and the difference is obvious. Metal halides often have a color temperature around 3500K–4000K, while high-performance LEDs run between 5000K–5700K. The result? Half the track looks warm and yellowish, and the other half icy blue.
That’s not just an aesthetic problem—it affects depth perception and camera calibration too. For international or broadcast events, the entire lighting system needs to maintain a consistent color temperature (usually between 4500K and 5000K) and a CRI above 90 to make everything—from the wood tones to team uniforms—look accurate on screen.
The fix is simple in concept but costly in practice: standardize your fixtures. Once all lights are from the same family and color profile, the track immediately looks cleaner, brighter, and more professional.
Maintenance Neglect
Lighting systems might not need daily attention, but they definitely can’t be ignored. Over time, dust buildup, insect debris, or fixture misalignment can reduce effective brightness by 10–20%. For a venue designed to meet 1,500 lux for competition, that drop could mean falling below the official requirement.
Regular maintenance schedules—say, cleaning lenses twice a year and rechecking aiming once every 12–18 months—can prevent most of these problems. LEDs don’t burn out as quickly as traditional lamps, but their optical clarity and beam focus can still degrade if left unchecked.
Some venues even use automatic self-monitoring systems that report when a fixture’s output drops below a certain threshold. That kind of setup might sound fancy, but for major arenas, it ensures consistent lighting quality without constant manual checks.
Energy Waste and Poor Control
Energy waste is another silent issue that shows up over time. Without proper lighting control systems, operators often end up running the entire system at full output—even for casual training sessions or daytime events. That means you’re blasting 1,500–2,000 lux when 400 lux would’ve been perfectly fine.
Modern zoning and dimming systems solve this by allowing operators to adjust brightness and turn off unused areas. For instance, you could light only the track perimeter for a morning training ride, or lower everything to 50% brightness during setup hours. Over a year, those adjustments can cut energy consumption by 30–50%, which adds up to significant savings.
Poor control setups can also mess with uniformity. If zones aren’t properly balanced, you can end up with the inner curve darker than the outer edge, especially when switching from “training” to “competition” mode. That’s why lighting control systems should be carefully calibrated with preset brightness levels for each mode rather than adjusted manually every time.
Other Subtle Problems That Sneak In
Sometimes, the problems are smaller but still annoying. For example, flicker can sneak in when older dimming drivers are used or when fixtures aren’t perfectly synchronized. Even a tiny flicker, invisible to the naked eye, can ruin slow-motion video or cause eye fatigue for spectators.
Another issue is color shift over time. After several thousand hours, cheaper LED fixtures can slowly drift in color temperature, turning slightly greenish or bluish. That’s why using high-quality LEDs with tight binning tolerances (within ±100K) is worth the investment—it keeps the light consistent across all fixtures for years.
Finally, designers sometimes underestimate reflected glare from spectators’ phones, glass panels, or banners. In a brightly lit arena, reflective materials can throw unwanted highlights into camera angles or even distract riders. Using matte finishes on nearby surfaces and careful fixture placement helps reduce these side effects.
Closing Remarks
Designing lighting for a velodrome is as much about precision as it is about experience. The right setup blends brightness, uniformity, color quality, and efficiency into one smooth visual environment where riders, cameras, and audiences all thrive.
A great lighting design doesn’t call attention to itself—it simply lets the sport shine. Whether it’s for a community training track or a world-class indoor arena, thoughtful design ensures that every race, every corner, and every finish line looks—and feels—like a moment worth watching.